Posts tagged Gluten-Free
Spanish Tortilla for Spring

by Kelly Knight, Marketing Manager for The Good Table


Image: Kelly Knight


From the Kitchen

Tortilla Espanol or Spanish tortilla is one of Spain's most popular national dishes, and it is pretty much eggs, potatoes and onions cooked gently in olive oil. It’s basically an omelette, but denser, and used as an appetizer or snack.

I ate it fresh out of the pan, but I’m told it’s even better at room temperature. I’d have it with a side green salad, or breakfast meat if you want a heartier meal.

SPANISH TORTILLA
Recipe adapted from The Mediterranean Dish

INGREDIENTS
10 medium eggs
Salt
1 teaspoon sweet Spanish paprika, optional
1 cup extra virgin olive oil
1 ½ lb russet potatoes (or 2 to 3 russet potatoes), peeled, halved and sliced cross-wise
1 large yellow onion, peeled, halved and sliced cross-wise
4 scallions, trimmed, chopped (both white and green portions)
Optional: a handful of greens like baby spinach or baby kale

DIRECTIONS

  1. In a big bowl, whisk together the eggs, salt, and paprika. Set aside for now.

  2. Prepare a 10-inch oven-proof nonstick skillet or a well-seasoned cast iron skillet. Heat the olive oil in the skillet over medium-high heat until shimmering but not smoking.

  3. Add the potatoes, onions, and scallions to the oil (at first, they won't all seem to fit, but with a little stirring, they'll compress as they cook). Lower the heat immediately to medium-low and watch to control the heat and make sure it continues to gently bubble. Cook for 25 minutes, stirring occasionally, until the potatoes are very tender.

  4. Use a heat-safe strainer over a heat-safe bowl to drain the olive oil (reserve the oil aside for now).

  5. Season the potatoes well with kosher salt and add them to the egg mixture in the bowl.

  6. Turn the oven broiler on.

  7. In the skillet, heat 3 tablespoons of the reserved olive oil over medium heat. Pour in the egg and potato mixture, and gently press to even out the top. Reduce the heat to medium-low. Cook until you see the edges of the omelet begin to set and firm up then put the pan under the broiler to finish cooking. Broil for about 5 minutes, watching carefully until the eggs are cooked through and the top of the omelet browns slightly (see notes if you prefer to finish cooking on stovetop).

  8. Allow the tortilla a few minutes before serving.

  9. To serve, invert the tortilla onto a large serving platter (you may need to loosen the edges using a spatula). Cut into 6 slices and serve.

Melinda's Favorite Gluten and Grain-Free Bread

From the Kitchen

In our spiritual - and soon our café community - we have a strong commitment to serve foods that are delicious and nutritious, but also meet the various allergy limitations of some members. Of course, one of the most difficult and challenging items on our menu is bread.

Bread is an ancient human food that has significant liturgical significance in Jewish and Christian communities, but it is now a challenging food to offer when so many folks have developed gluten intolerance or are choosing to eat vegan, paleo, or keto.

Amongst clergy colleagues, we’ve had a lot of conversations about how to provide a single loaf that most, if not all, could share together for communion. Here’s my favorite that I regularly bake for our Good Table church community that I found on the blog:  An Edible Mosaic.

It’s basically an egg bread made with almond flower, arrowroot, tapioca starch, and flaxseed meal. It is leavened with salt and apple cider vinegar. You can use coconut oil or ghee, almond milk or cow’s milk if you want to make it vegan. While you may not have all these ingredients in your pantry, they are easily sourced in bulk in natural groceries and may even be readily available through some chain stores. But best of all, it is easy and delicious! And unlike many gluten-free breads, it isn’t “crumbly” or dry and holds together well, making it versatile for many uses.

Image courtesy An Edible Mosaic

Best Paleo Sandwich Bread
by An Edible Mosaic

Prep Time: 10 mins. 

Cook Time: 40-45 mins 

Yield: 1 (8 1/2 x 4 1/2 inch) loaf or 1 8” round, or 4 mini-loaves

Ingredients:

2 cups almond flour

6 tablespoons arrowroot starch

4 tablespoons golden flax seed meal

2 tablespoons tapioca starch

3/4 teaspoon fine salt

3/4 teaspoon baking soda

4 tablespoons ghee or coconut oil, melted and cooled slightly, plus more to grease the baking pan

4 eggs lightly beaten

1/2 cup unsweetened almond milk or cow’s milk

1 1/2 teaspoons apple sider vinegar

Instructions:

1. Preheat oven to 350 degrees, generously grease baking pan

2. Whisk together the almond flour, arrowroot, tapioca starch, flaxseed meal, salt and baking soda in a large bowl

3.  Whisk together the slightly cooled ghee or coconut oil, eggs, “milk”, and vinegar in a medium bowl or large measuring cup. (I melt the ghee in the microwave)

4. Add the wet ingredients to the dry ingredients all at once and stir until combined, but do not over-mix (if you stir it too much, it will not rise)

5. Immediately pour batter into the prepared pan and bake until a toothpick inserted in the center comes our clean, about 40-45 minutes (depending on the pan.)

6. Cool on a wire rack before slicing and serving. Freezes well and keeps in the fridge for up to five days.

Enjoy!

Rainy Day Biscuits

by Kelly Knight, Marketing Manager for The Good Table

From the Kitchen

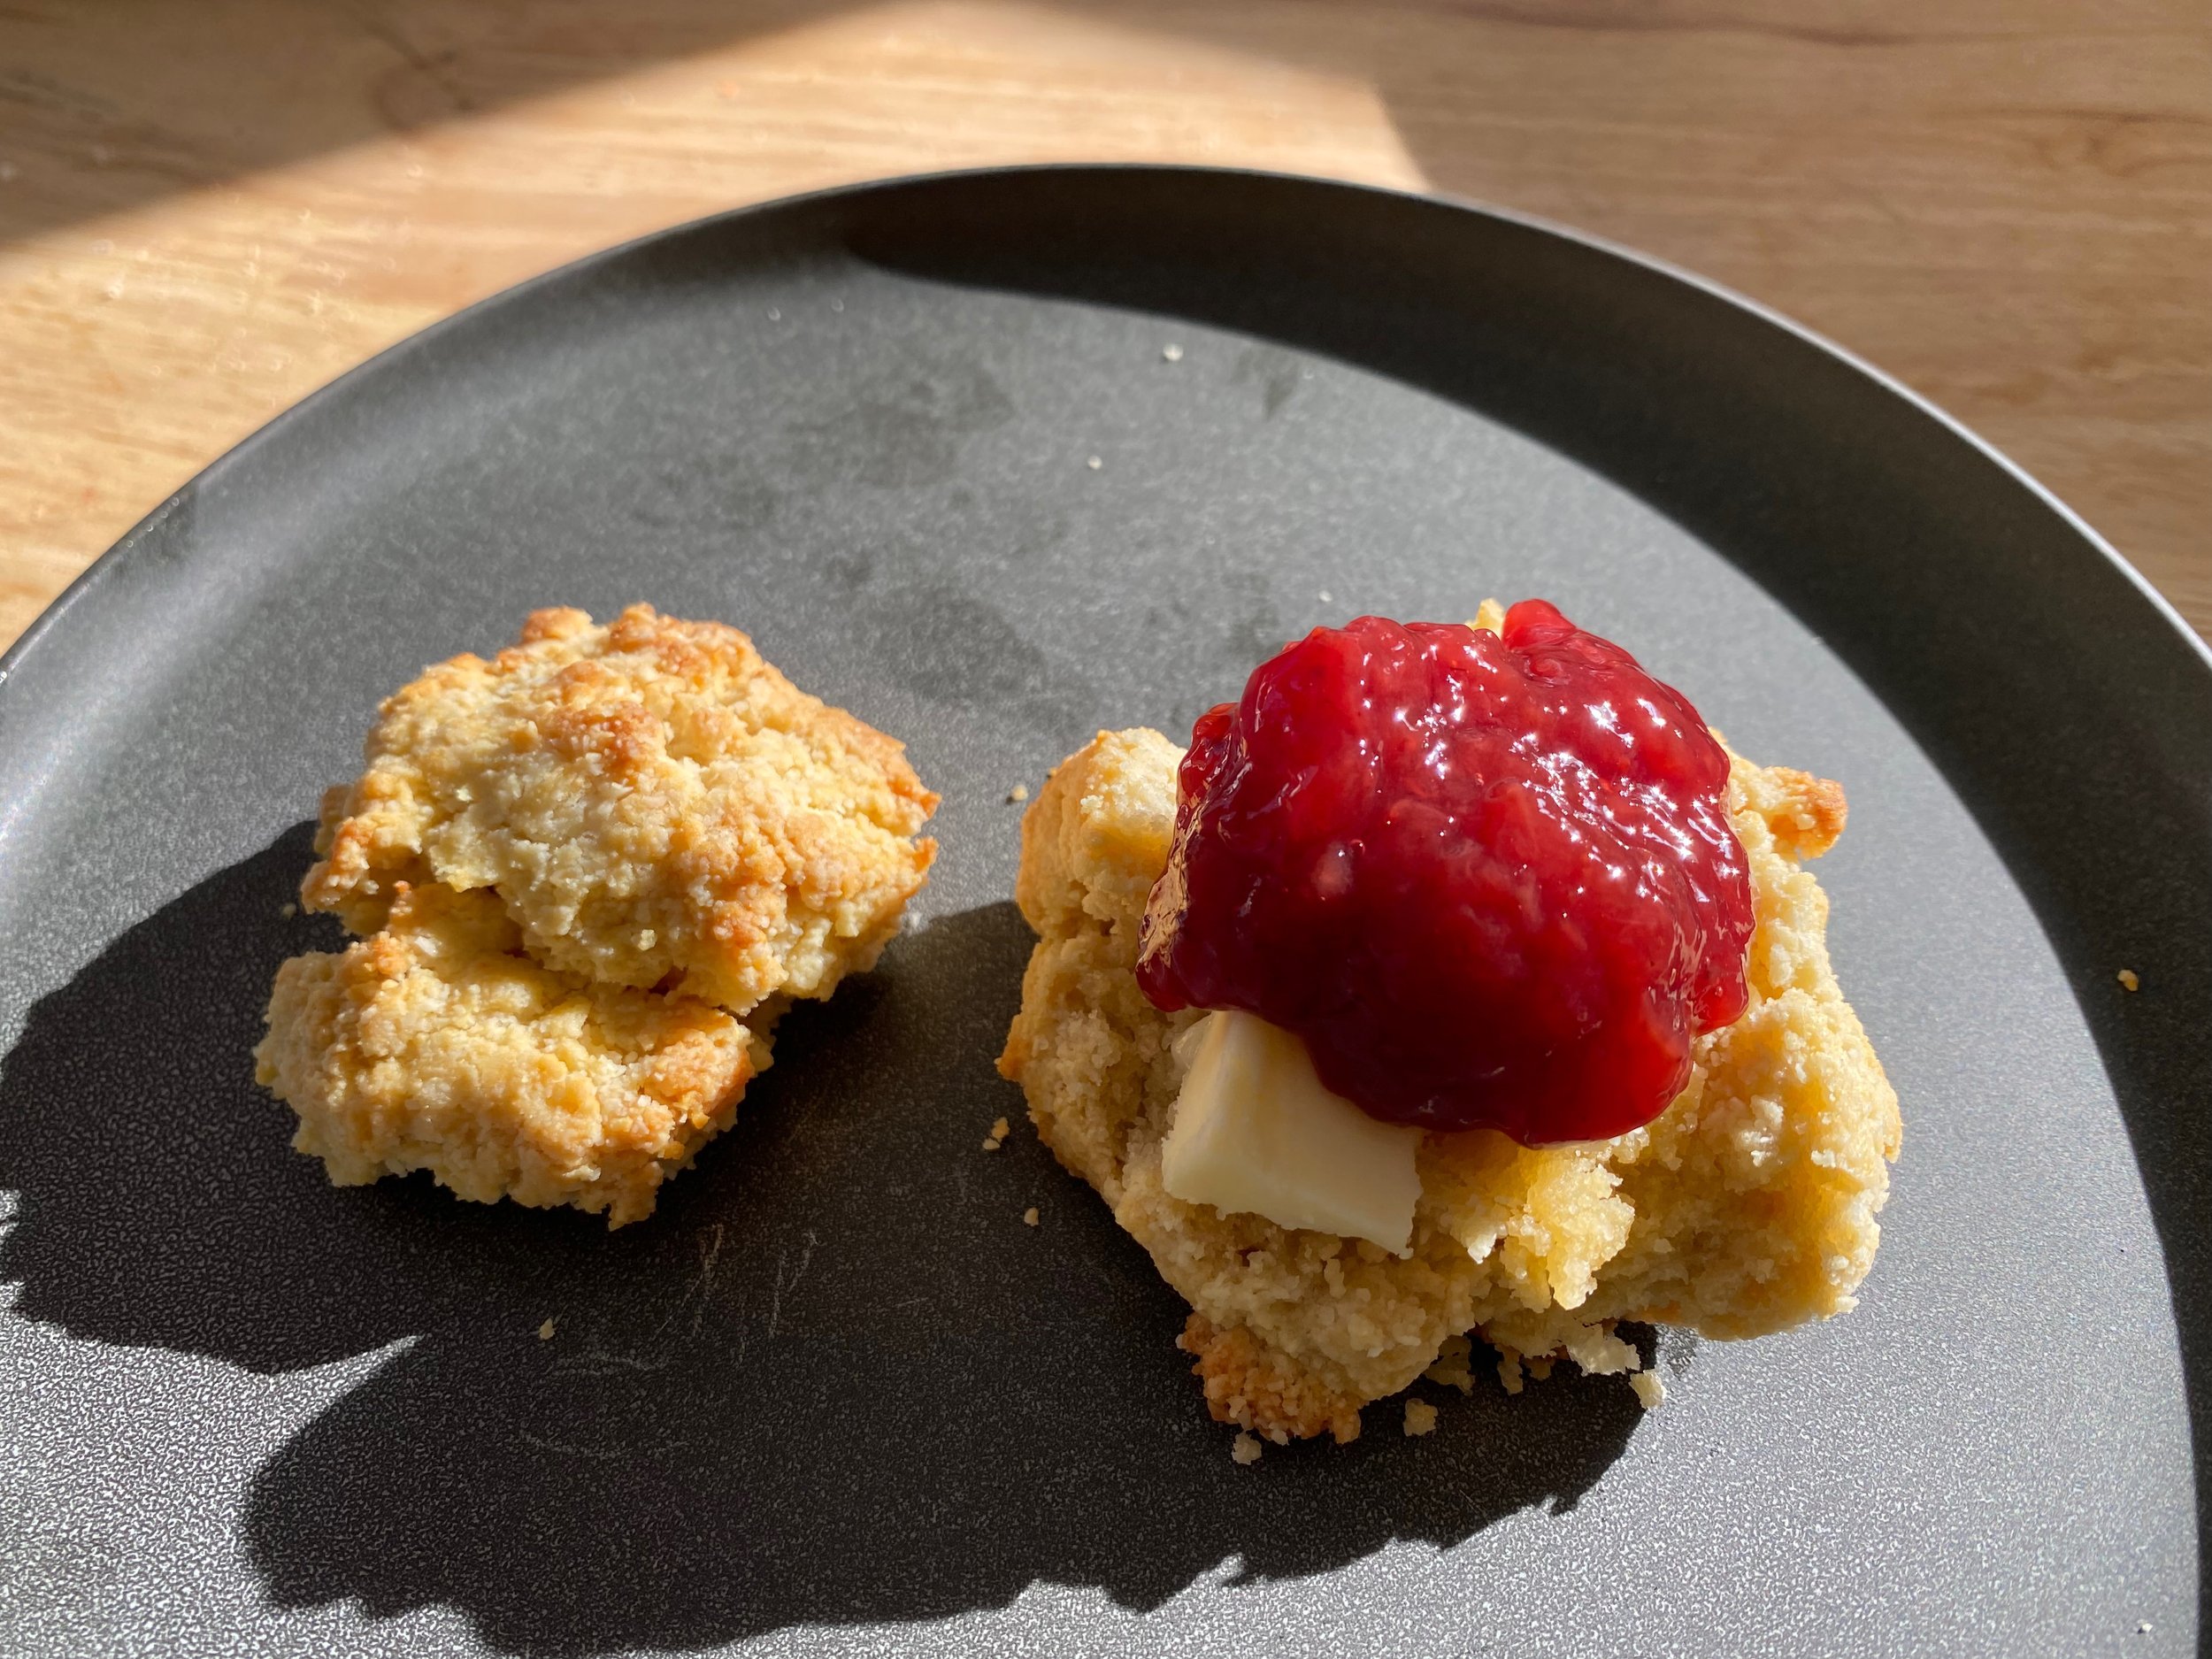
I love a biscuit. Flaky, buttery, warm from the oven… there’s nothing better than a fresh biscuit. My partner though is gluten-free, and that makes biscuiting rather tricky. Until I discovered this amazing, one-bowl recipe from Zen Belly! The biscuits are denser than a wheat flour biscuit, but really delightful as a base for eggs benedict, or even just butter and jam. If you’re gluten-free or paleo, I’d recommend giving these a try. I made some today, and it was a lovely treat!

Paleo biscuit with butter and jam

Paleo biscuit with butter and jam

Rainy Day Biscuits
by Simone Miller of Zen Belly

Yield: 6 large biscuits/12 small biscuits

INGREDIENTS
2 1/2 cups almond flour
3/4 cup arrowroot flour
1/2 teaspoon sea salt
1/2 teaspoon baking soda
4 tablespoons cold butter (frozen if possible)
2 tablespoons honey
2 eggs

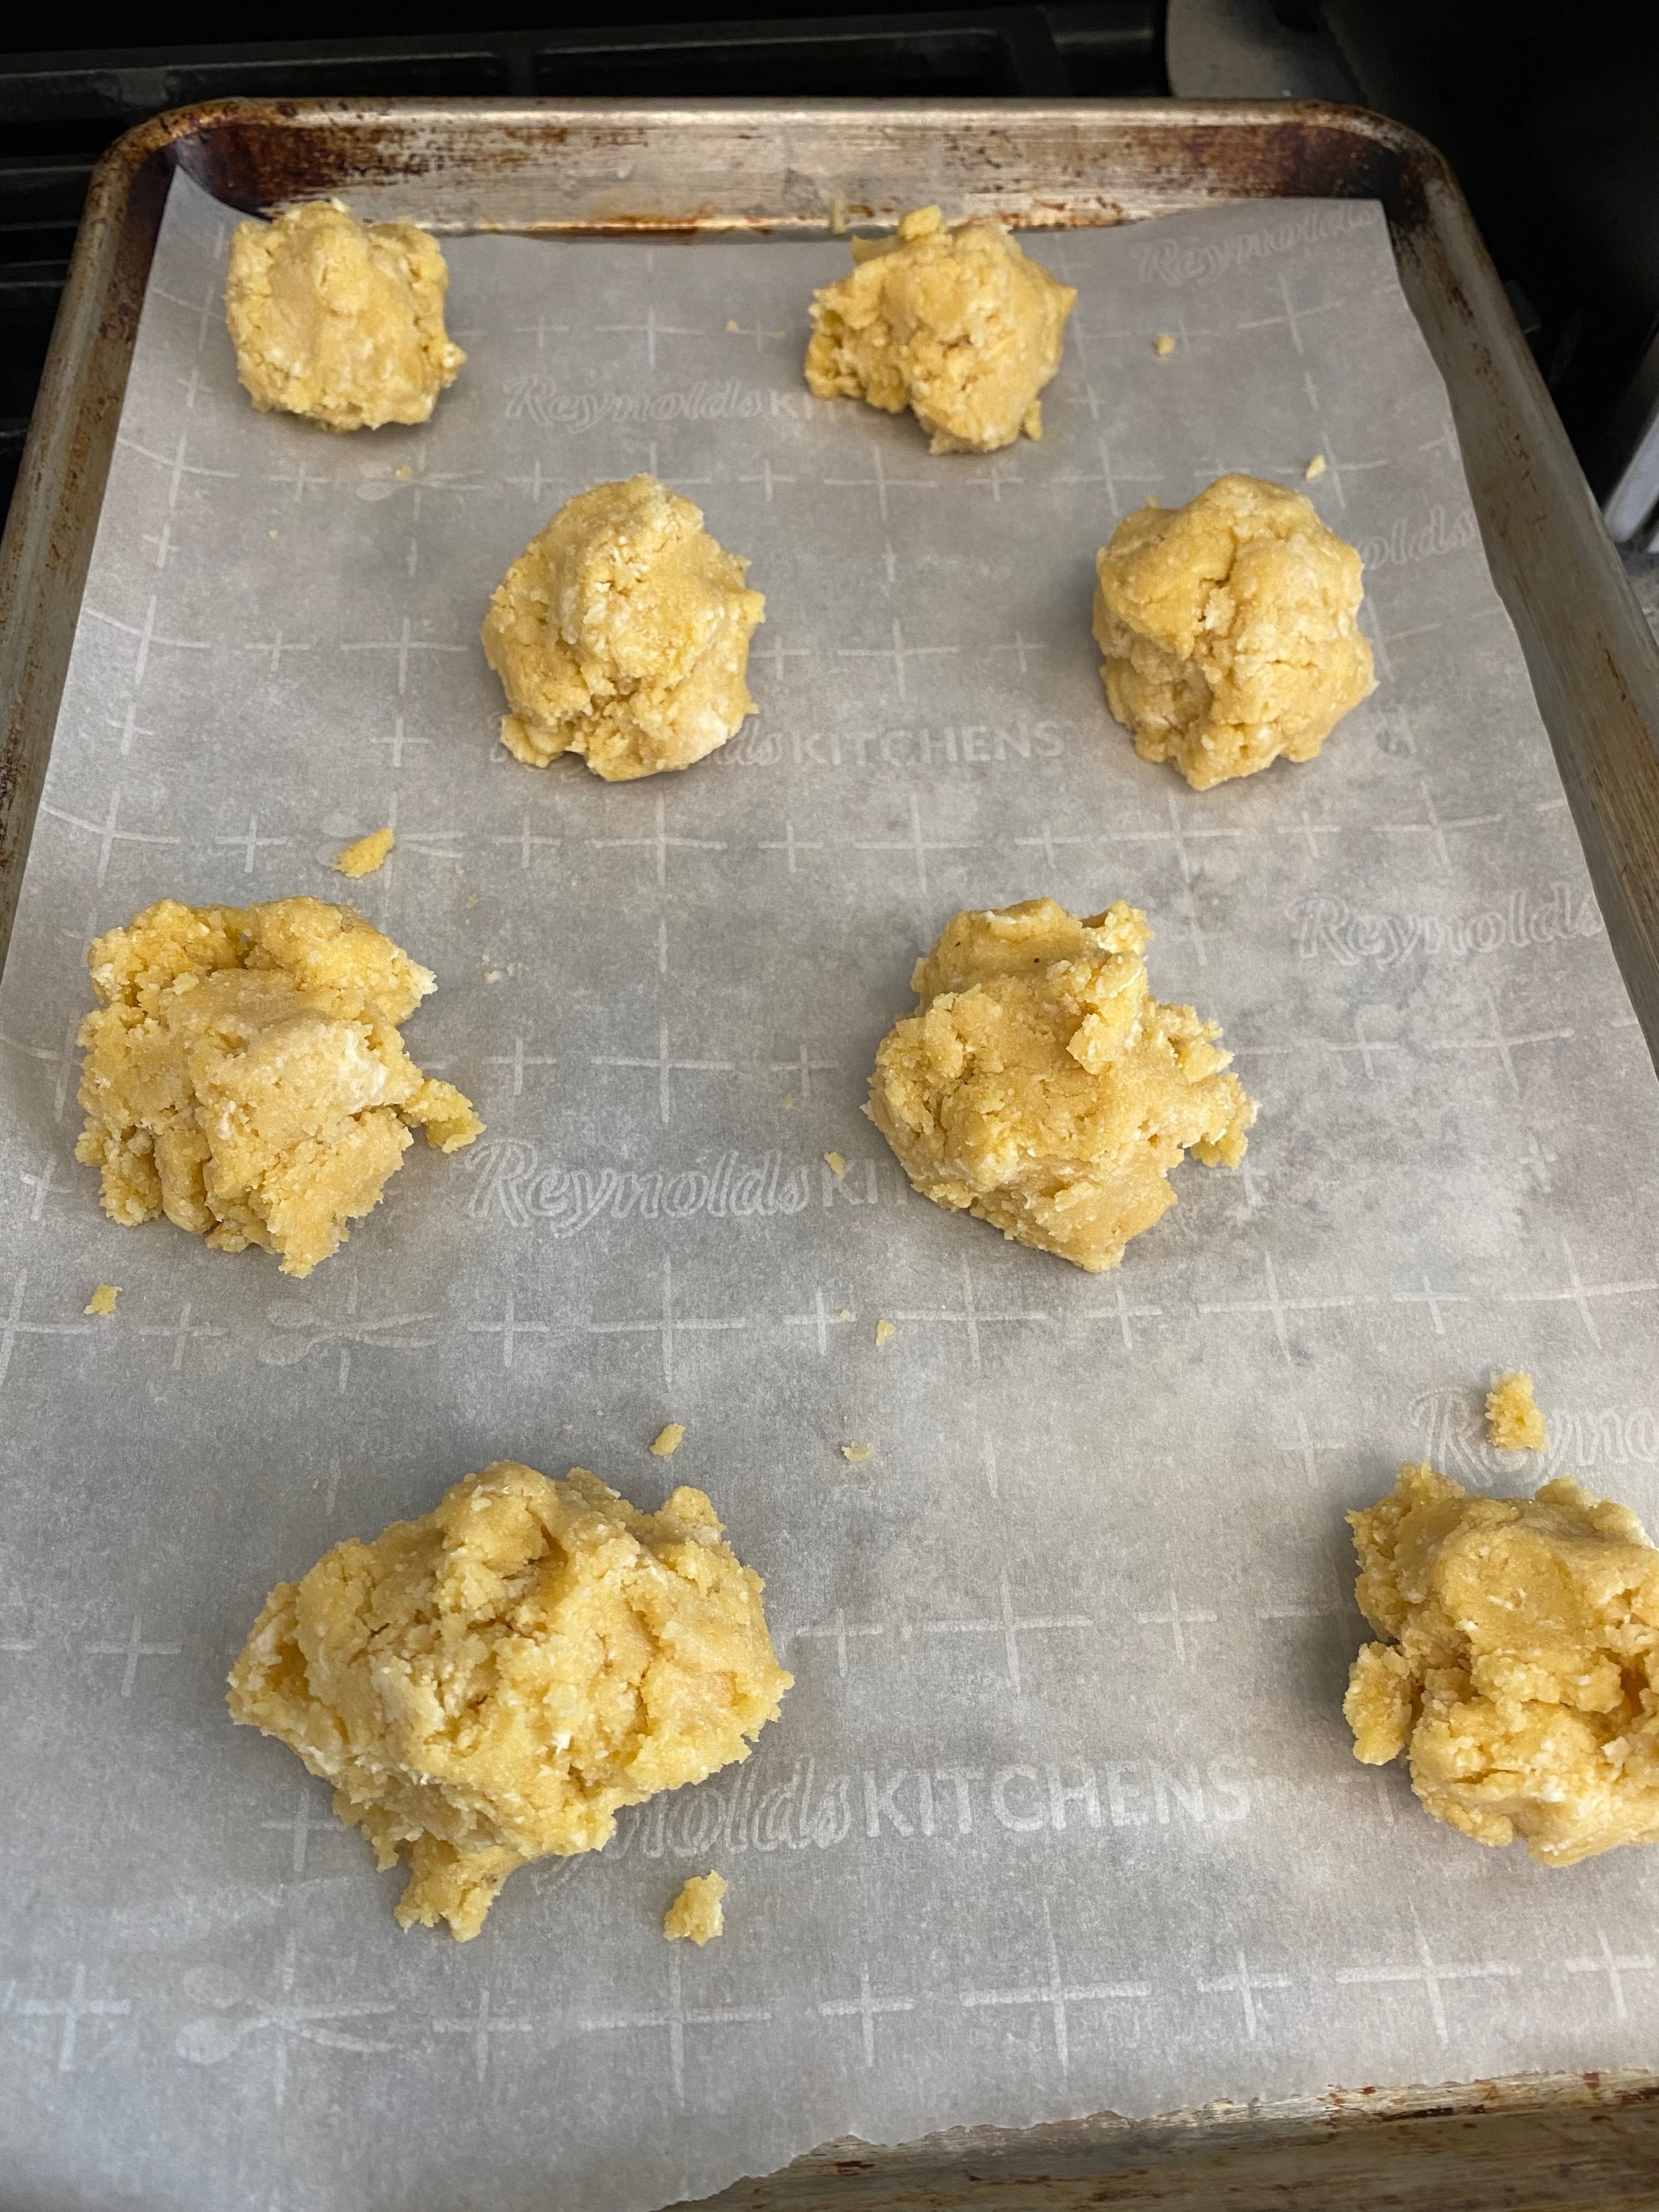
Ready to go into the oven!

DIRECTIONS

  1. Preheat oven to 350ºF and line a baking sheet with parchment paper.

  2. In a large mixing bowl, whisk to combine the almond flour, arrowroot, salt and baking soda. 

  3. Cut the butter into 4-5 pieces and cut into the dry ingredients with a pastry cutter or 2 knives. You’ll want the result to look like coarse crumbs, no larger than pea sized. (Kelly’s tip: I freeze the butter, then grate it with a box grater. It’s fun and easy, and I get great results.)

  4. In a small bowl, whisk together the honey and eggs.

  5. Gently mix into the dry ingredients, but try not to over mix. You want it just to come together.

  6. Drop the batter onto your prepared sheet with a large spoon. It helps to dampen your hands to shape them a bit- the dough is sticky. 

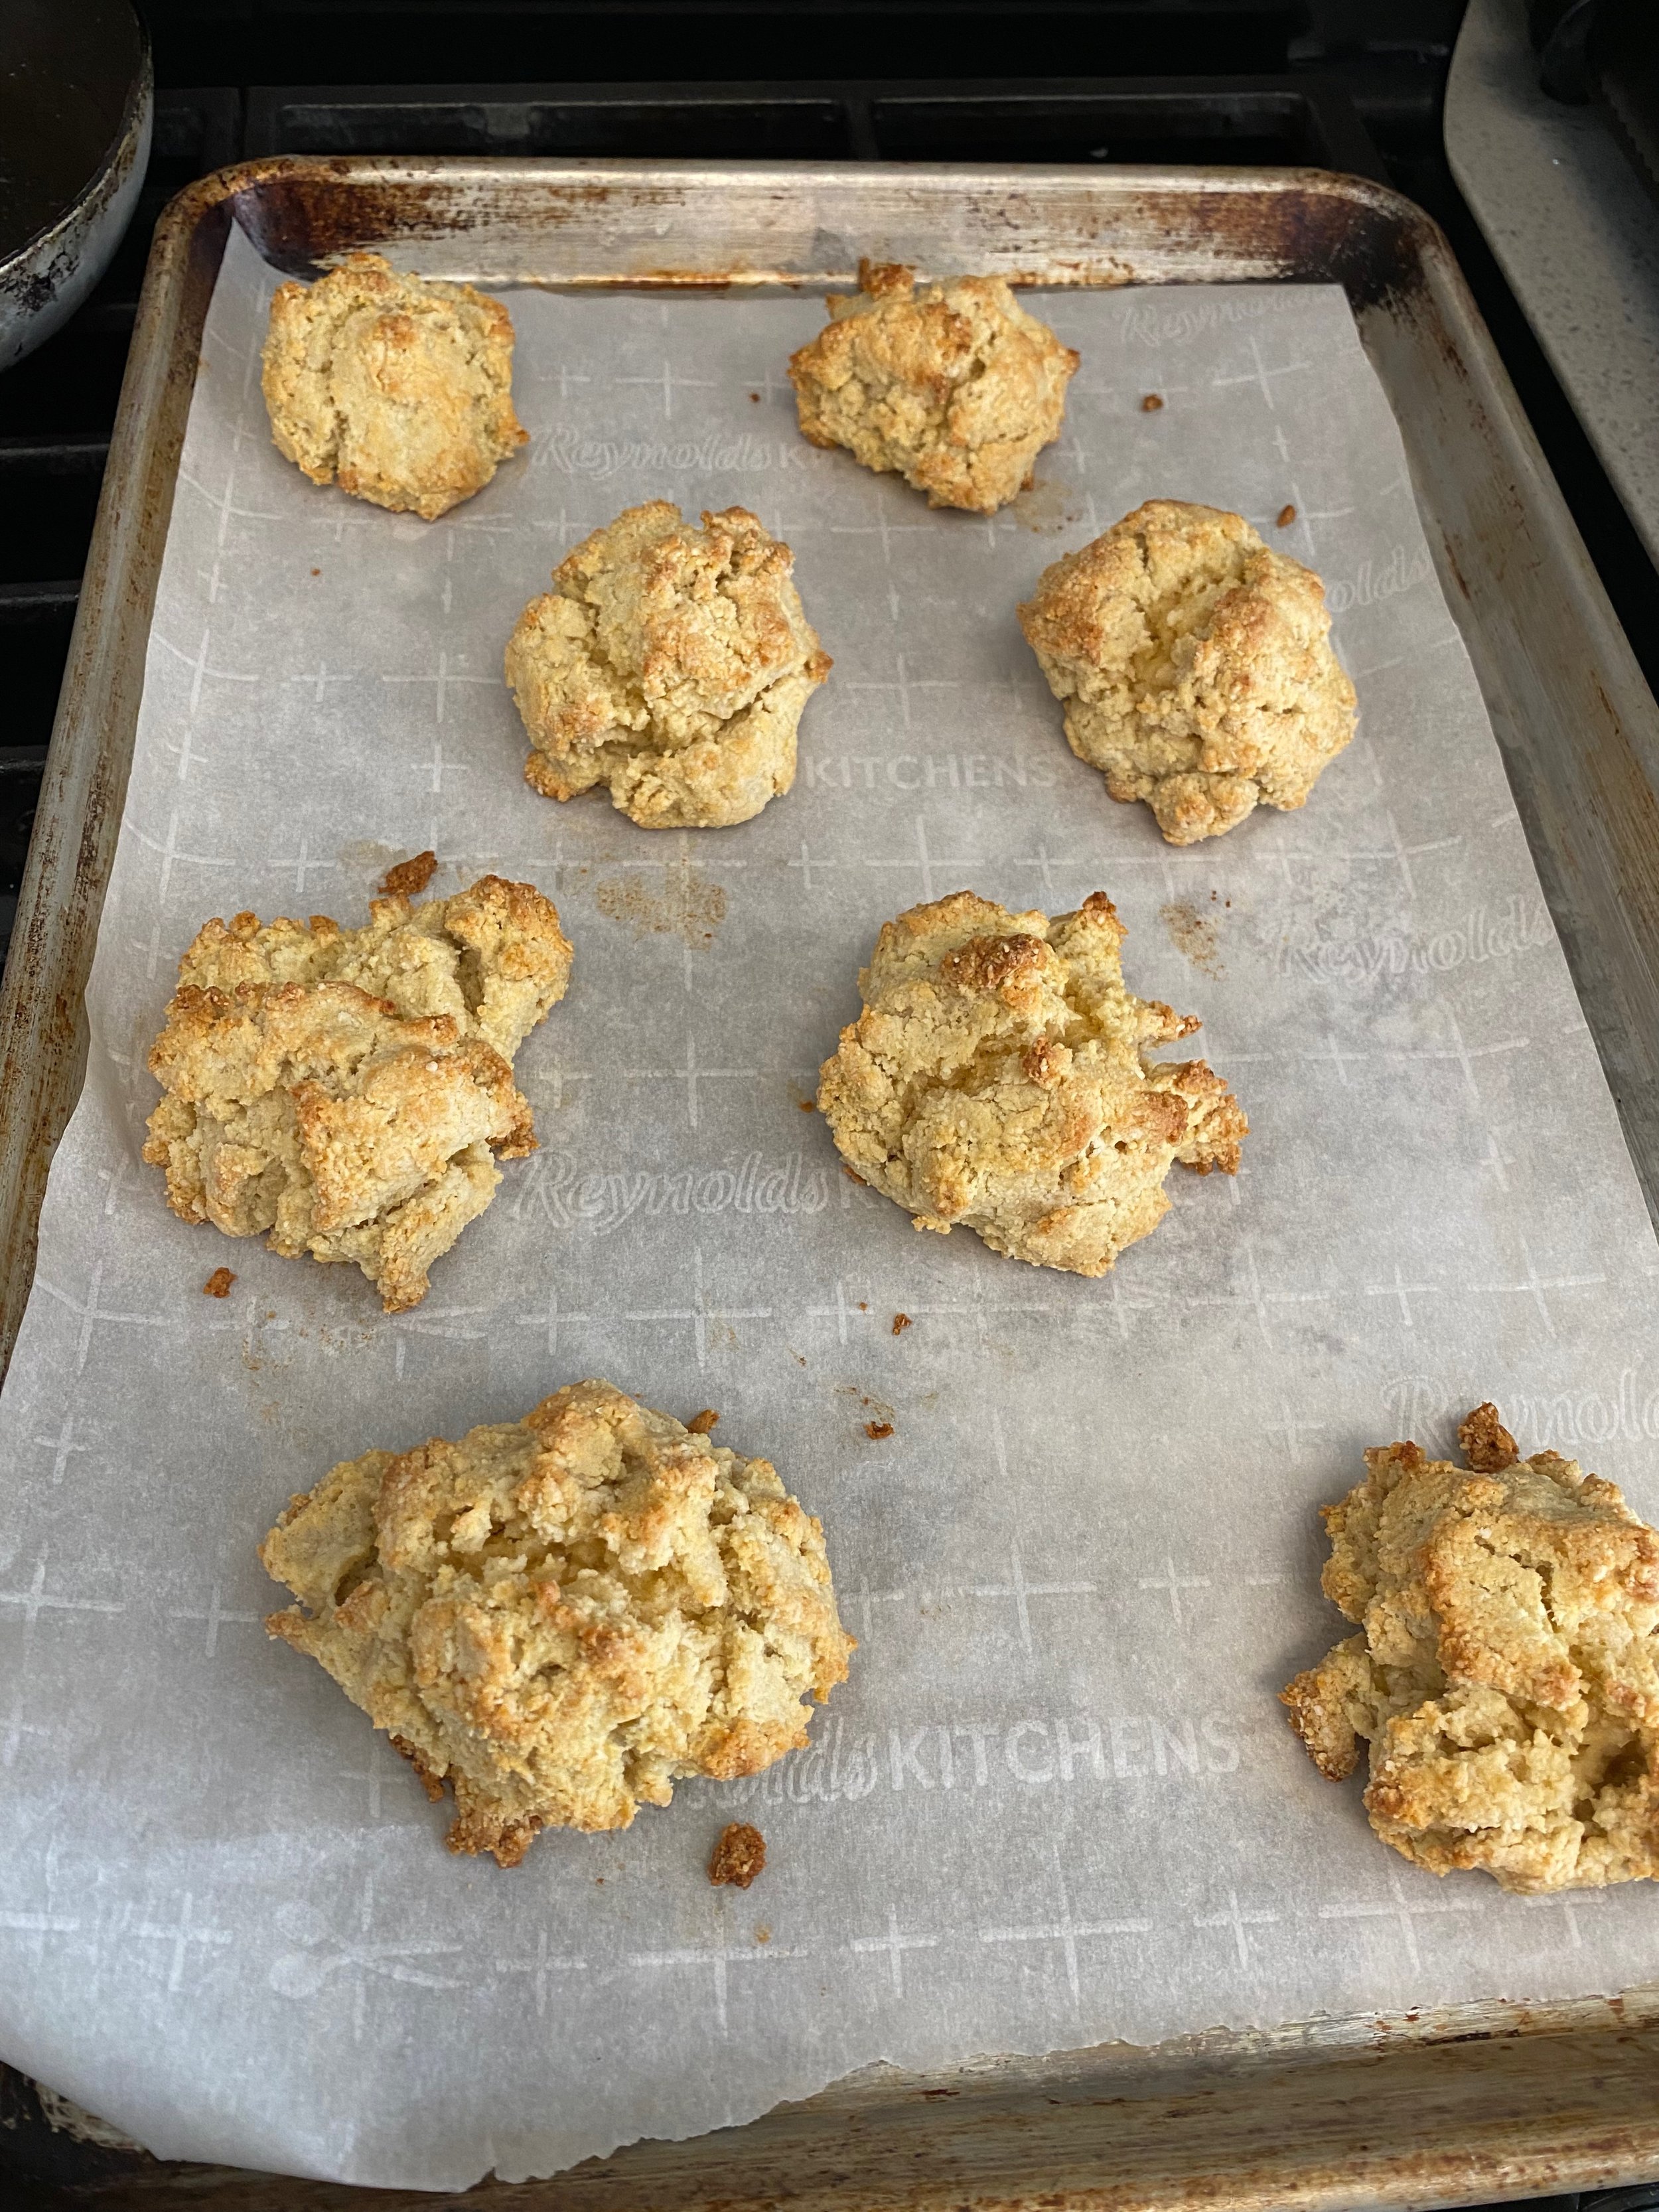
  7. Bake for about 15 minutes, until golden brown and done in the center.

Yum!

The Good Table At Home: Gluten-Free Thanksgiving

by Kelly Knight, Marketing Manager for The Good Table

From the Kitchen

My partner is gluten-free and holidays have been kind of a nightmare for him in the past. Everyone kind of rolls their eyes at peoples’ food sensitivities when it gets in the way of them enjoying traditional recipes, which I understand: the need for rituals that repeat year after year is really strong! But: I want to make sure my partner enjoys the holiday without having the anxiety that something that tastes delicious will cause pain and discomfort later on. So this year, I’m extensively researching gluten-free recipes so that he can fully participate in the wonder and bounty of Thanksgiving!

Read on for a highly recommended gluten-free stuffing recipe, followed by a round up of other gluten- and dairy-free recipes to make your holiday more accessible.


This recipe is from A Spicy Perspective. They wrote some notes to get the most out of your stuffing:

Use the best Gluten-Free white bread you can find. Cut the bread into cubes and toast the cubes in the oven so they hold their shape after you add liquid.

Amp up the other ingredients. You never realize what a distinctly iconic flavor wheat has, until you stop eating it. In order to not miss the wheat in the Thanksgiving stuffing, you must add more pops of freshness than you might overwise. After all, stuffing is primarily bread, butter, and herbs, so make the butter and herbs count! Dried cranberries are another great distraction. The tangy-sweetness balances the savory flavors.

INGREDIENTS
12 cups Gluten-Free White Sandwich Bread, cut into 1/2 inch cubes (from 1 large loaf, or 2 average loaves)
1 cup butter (2 sticks)
1 large sweet onion, peeled and chopped
1 1/4 cup chopped celery
1/4 cup fresh chopped parsley
2 tablespoons fresh chopped sage
1 tablespoon fresh chopped rosemary
1 tablespoon fresh chopped thyme
3/4 cup dried cranberries
1 1/2 cup turkey stock (or chicken broth)
2 large eggs
Salt and pepper

INSTRUCTIONS

  1. Preheat the oven to 400 degrees F. Set out a 9 X 13 inch baking dish, a large rimmed baking sheet, and a large saute pan (or skillet.)

  2. Cut the gluten-free bread into cubes. Spread the cubes out on the baking sheet and toast in the oven for 8-10 minutes.

  3. Meanwhile, chop the onion, celery, and herbs. Set the sauté pan over medium heat and add the butter. Once the butter has melted, sauté the onions and celery for 3 minutes to soften.

  4. Add the fresh herbs and sauté another 1-2 minutes. Then turn off the heat.

  5. Pour the dried cranberries, and turkey stock into the saute pan. Add 1 1/4 teaspoons salt and 1/2 teaspoon ground black pepper. Stir to combine and lower the temperature. Then stir in the eggs until well combined. (Make sure the mixture is just a little warm before adding the eggs, so they don't cook.)

  6. Once the bread cubes come out of the oven, pour them in the 9 X 13 inch baking dish. Pour the broth and vegetable mixture over the cubes and toss. Gently mix until well combined. Then spread the stuffing out evenly in the pan.

  7. Cover the dish tightly with foil, and bake for 30 minutes. If you would like the top to be crispy, you can take the foil off the last 5-8 minutes. Serve warm.


Here are some more resources for gluten-free Thanksgiving dishes:

Enjoy your holiday, no matter where you fall on the gluten spectrum! I hope you find peace, comfort, and joy this holiday season.