Posts tagged Recipe
Recipe: Shredded Fall Greens with Sherry Thyme Vinaigrette & Hazelnuts

In the Kitchen:

As the leaves turn golden and the air becomes crisp, it’s time to embrace the hearty and rich flavors of fall. This recipe for Shredded Fall Greens with Sherry Thyme Vinaigrette & Hazelnuts is the perfect way to celebrate the season. The dish is both vibrant and nourishing, offering a delicious balance of earthy, nutty, and tangy flavors. It’s not only vegan but also packed with nutrients, making it a wonderful addition to your autumn table.


Ingredients:

For the Salad:

  • 2 cups shredded kale (Tuscan or curly)

  • 2 cups shredded Brussels sprouts

  • 1 cup radicchio, thinly sliced

  • 1 small apple, thinly sliced (optional for a hint of sweetness)

  • 1/3 cup toasted hazelnuts, roughly chopped

  • 1/4 cup dried cranberries (optional for added color and sweetness)

For the Sherry Thyme Vinaigrette:

  • 1/4 cup extra virgin olive oil

  • 2 tbsp sherry vinegar

  • 1 tsp Dijon mustard

  • 1 tbsp fresh thyme leaves (or 1 tsp dried thyme)

  • 1 small shallot, finely minced

  • 1 clove garlic, finely minced

  • Salt and black pepper to taste

  • 1 tsp maple syrup (optional for a touch of sweetness)


Instructions:

1.   Prepare the Greens: Start by prepping your fall greens. Rinse the kale, Brussels sprouts, and radicchio thoroughly. Pat dry with a towel. Using a sharp knife or food processor, shred the kale and Brussels sprouts into thin strips. Thinly slice the radicchio and apple (if using). Toss all the greens together in a large mixing bowl to create a colorful base for your salad.

2.   Toast the Hazelnuts: Toast the hazelnuts to enhance their natural flavor and crunch. Heat a small, dry skillet over medium heat. Add the hazelnuts and toast them for about 5 minutes, stirring frequently to avoid burning. Once they’re fragrant and lightly browned, remove from heat, let cool, and roughly chop them. Set aside.

3.   Make the Vinaigrette: In a small bowl or jar, whisk together the olive oil, sherry vinegar, Dijon mustard, thyme leaves, minced shallot, and garlic. Season with salt and pepper to taste. If you prefer a slightly sweeter dressing, add the optional maple syrup. Adjust the seasoning to your liking.

4.   Dress the Salad: Pour the sherry thyme vinaigrette over the shredded greens. Toss well to ensure all the leaves are evenly coated. The vinaigrette should help soften the kale and Brussels sprouts slightly, making them more tender without losing their fresh crunch.

5.   Add the Toppings: Top the dressed greens with the toasted hazelnuts, dried cranberries, and apple slices for extra texture and flavor. The hazelnuts add a delightful nuttiness that pairs perfectly with the earthy greens, while the cranberries and apples provide a touch of sweetness and tartness.

6.   Serve: Serve immediately for a crisp and fresh salad, or let it sit for 10–15 minutes to allow the flavors to meld and the greens to soften further. This salad makes a great side dish for a cozy fall meal or can be enjoyed as a light, satisfying lunch.


Pro Tips:

Make it a meal: Add some protein like roasted chickpeas or grilled tempeh to make this salad a more substantial main course.

Storage: If you’re making this ahead, keep the dressing and greens separate until just before serving to maintain their crispness.

Nut alternative: If you’re allergic to hazelnuts, swap them out for toasted almonds or walnuts for a similar crunchy texture.


Why You’ll Love This Recipe

This salad is the epitome of autumn in a bowl. The combination of hardy greens with the sweet and nutty vinaigrette creates a dish that is packed with nutrients and bursting with flavor. The kale and Brussels sprouts are rich in vitamins A, C, and K, while the hazelnuts provide healthy fats and protein. The sherry thyme vinaigrette ties it all together with its herbaceous, tangy, and slightly sweet notes.

Whether you’re hosting a fall gathering or just craving a healthy and delicious meal, this Shredded Fall Greens with Sherry Thyme Vinaigrette & Hazelnuts is sure to be a crowd-pleaser!


Looking for some fresh locally sourced ingredients to take this recipe to the next level? Visit the Planting Justice El Sobrante Farmer’s Market open every Sunday from 10 AM - 2 PM!

The Good Table At Home: Italian Tomato Pie

by Rev. Melinda McLain

From the Kitchen:

When our gardens are wild with tomatoes, we’re always on the hunt for new recipes. This recipe for an Italian Tomato Pie was inspired by the seasonal menu for "all things tomatoes" that Pastor Melinda used to enjoy at Kerbey Lane, a restaurant in Austin, Texas.

33581_439389142850_2693354_n.jpg

INGREDIENTS
9” pie crust, store-bought or made with your favorite recipe
4 medium heirloom tomatoes
1/4 cup tapioca flour
1 tsp Italian herb mix (oregano, thyme, rosemary, etc.)
1/2 tsp salt
1/4 tsp pepper
1 cup chopped Swiss chard
1/2 cup cheese (cheddar, mozzarella, or Gruyere would all be good)
1/2 cup breadcrumbs
1/2 cup grated Parmesan or Romano cheese

DIRECTIONS

  1. Preheat the over to 450 degrees.

  2. Peel and slice about 4 medium heirloom tomatoes and place in a bowl. Add 1/4 cup tapioca flour (to thicken juice), Italian herbs, salt, and pepper and mix gently.

  3. Press pie crust into pan (use pre-made, or your own recipe). Layer chard first on the bottom (note: this is important to avoid a soggy bottom), then tomato mixture, then some grated cheese, then chard, then tomatoes until pie crust is nearly full.

  4. Top with bread crumbs mixed with fresh Parmesan or Romano cheese. Put in 450 degree oven for 10 minutes, reduce temp to 375 and bake for 45 minutes or until crust is brown and filling is bubbly. Cool and serve. Even better cold the next day! Enjoy!


Looking for some fresh locally sourced ingredients to take this recipe to the next level? Visit the Planting Justice El Sobrante Farmer’s Market open every Sunday from 10 AM - 2 PM!


Repost from September 7, 2021. The recipe is so good we just had to share it again!

In the Kitchen: Steak, Guinness & Cheese "Pi"

Rev. Dr. Melinda V. McLain’s take on the recipe in celebration of Pi Day and St. Patricks!

In the Kitchen:

In celebration of Pi Day (3/14) and St. Patricks Day this Sunday, here’s a fun pie recipe that Pastor Melinda shared with us! A traditional steak and Guinness pie by chef, Jamie Oliver. This is made particularly easy by using puff pastry for the top pie layer! If you want to skip the puff pastry layer, you could serve this as a normal stew.


Steak, Guinness & Cheese Pie

Link to Original Recipe

Ingredients

  • 3 red onions

  • 3 cloves of garlic

  • 2 carrots

  • 2 sticks of celery

  • 4 field mushrooms

  • a few sprigs of rosemary

  • olive oil

  • 1 kg quality brisket or stewing beef , cut into 2cm cubes

  • 440 ml Guinness (no lager, please!)

  • 2 heaped tablespoons plain flour , plus extra for dusting

  • 140 g Cheddar cheese

  • 170 g puff pastry

  • 1 large egg


Method

  1. Preheat the oven to 190ºC/375ºF/gas 5.

  2. Peel and chop the onions, garlic, carrots and celery, slice the mushrooms, and pick and finely chop the rosemary.

  3. Heat 1 tablespoon of olive oil in a large ovenproof pan over a low heat, add the onions and fry gently for about 10 minutes, or until softened, stirring occasionally.

  4. Turn the heat up, add the garlic, carrots, celery and mushrooms, then mix everything together before stirring in the beef, rosemary, and a pinch of sea salt and 1 level teaspoon of black pepper.

  5. Fry fast for 3 or 4 minutes, then pour in the Guinness, stir in the flour and add just enough water to cover.

  6. Bring to a simmer, cover the pan with a lid and place in the oven for 2½ hours, or until the meat is very tender and the stew is rich, dark and thick, stirring halfway. A perfect pie filling needs to be robust, so if it’s still quite liquidy, place the pan on the hob and reduce until the sauce thickens.

  7. Coarsely grate the cheese, stir half through the pie filling, then transfer to a pie dish and leave to cool slightly.

  8. Meanwhile, dust a clean work surface with flour and roll the pastry out to the thickness of a pound coin.

  9. Sprinkle the remaining cheese over the pie filling. Place the pastry over the top of the pie dish pinching or folding and tucking in the edges to seal, then lightly score the surface with a criss-cross pattern.

  10. Beat the egg, then brush over the top of the pie and bake directly on the bottom of the oven for 45 minutes, or until the pastry is cooked, puffed and beautifully golden. Delicious served simply with peas.

Recipe: The Joy of Za’atar

The Joy of Za’atar

by Melinda V. McLain

As our gardens give up the last bits of summer harvest, it’s now time for Fall feasting on hard squashes, gourds, and of course, some of ya’ll are having a great time with your annual love affair with all things pumpkin.

Before the pandemic, The Good Table UCC spiritual community always had a community meal after our Sunday Gathering that we called La Mesa. Like so many other things lost during the pandemic, we have not restarted this weekly shared meal due to COVID concerns. But here’s a favorite dish that Bonnie Hariton used to bring to share at La Mesa from Jerusalem: A Cookbook by Yotam Ottolenghi and Sami Tamimi, that you can make it home. And hopefully, we’ll be able to restart La Mesa again in our new space in El Sobrante sometime next year!

The star ingredient of this dish is a Middle-Eastern spice blend called za’atar. You can make this spice yourself, or you can buy it at Middle-Eastern or other well-stocked grocers. The name, za’atar is of ancient origin, possibly Akkadian, but also describes the plant known in English as hyssop. While this spice blend varies from culture to culture in the Middle East, it is usually a blending of herbs such as oregano, thyme, coriander, marjoram, or hyssop with sumac, sesame, and salt. And even if this recipe doesn’t appeal to you, za’atar is a fabulous addition to almost any dish that needs a bit more pizzazz!

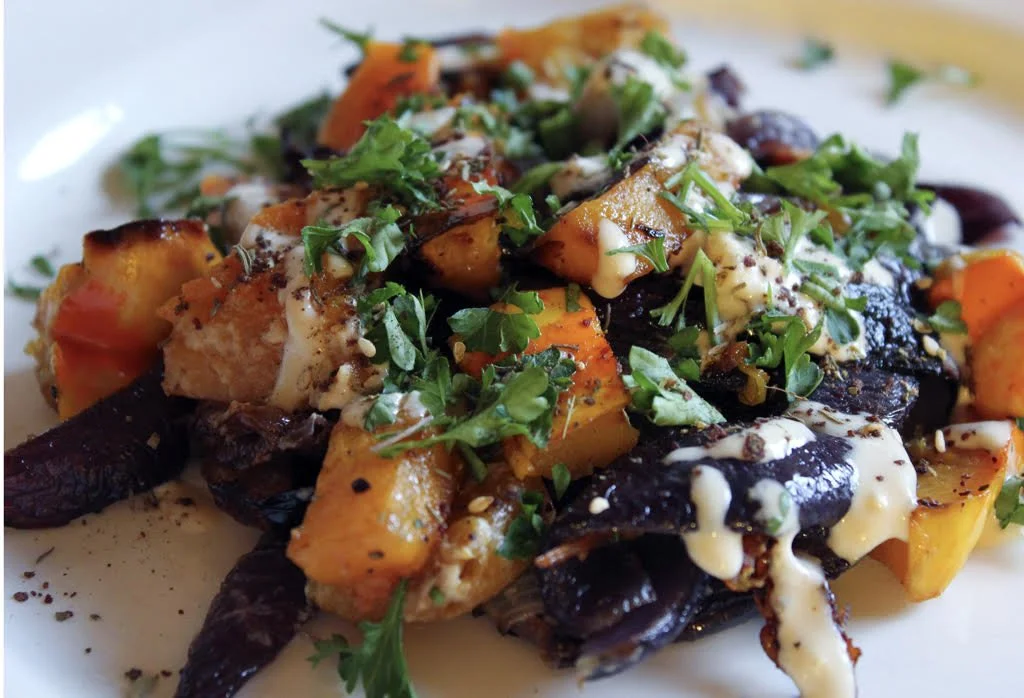
Roast Butternut Squash with Red Onion, Tahini, and Za’atar

Great as a vegetarian/vegan entree or an excellent side dish! Consider adding to your Thanksgiving or holiday table too.

Ingredients:

1 large butternut squash, cut into wedges (some like it peeled)

2 red onions, cut into 1” wedges

4 tbsp good olive oil

Maldon (or another good) sea salt and black pepper

3 1/2 tbsp tahini paste (easily found now at Trader Joe’s!)

3 1/2 tbsp lemon juice

3 tbsp water

1 small garlic clove, crushed

1 oz pine nuts (about two tbsp)

1 tbsp za’atar

1 tbsp roughly chopped parsley

Directions:

Preheat oven to 425 degrees. Put the squash and onions in a large bowl, add three tablespoons of olive oil, a teaspoon of salt and some black peeper, and toss well. Spread on a baking sheet and roast for 40 minutes until the vegetables have taken on some color and are cooked through. Keep an eye on the onions – they may cook faster than the squash, so they might need to be removed earlier. Remove from oven and let cool.

Put the tahini in a small bowl with the lemon juice, water, garlic and a 1/4 tsp of salt. Whisk to the consistency of honey, adding more water or tahini as necessary.

Pour the remaining oil into a small sauté pan on medium low heat. Add the pine nuts and half a teaspoon of salt, cook for two minutes, stirring until the nuts are golden brown, then tip the nuts and oil into a small bowl.

To serve: spread the vegetables on a platter and drizzle over the sauce. Scatter the pine nuts and oil on top followed by the za’atar and parsley. Option: Bonnie throws in some pomegranate seeds for color and little flavor bombs!

Happy Fall!

Recipe: Harvest Fatoosh Style Salad

We’re sharing this week’s recipe from a fabulous local organization run by an Episcopal priest friend of Rev. Melinda. You can check out their website by CLICKING HERE!

Harvest Fatoosh Style Salad

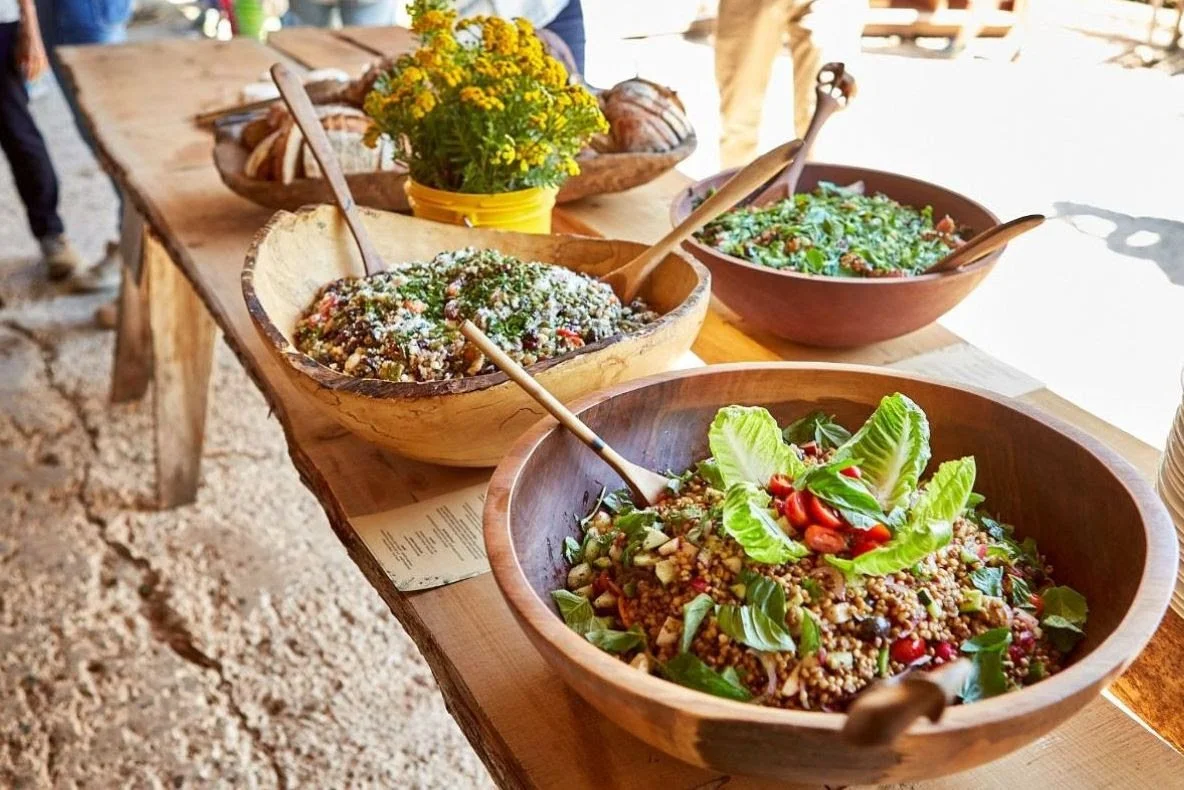
At our 8th Annual Harvest, in August, we were treated to a delicious salad made with blistered whole grain Hourani berries. The salad was created by Chef Dominic Machi, Director of Food and Nutrition Services at one of California’s largest school districts, Mt. Diablo Unified School District, along with his Culinary Manager, Chef Joshua Gjersand.

Since then we’ve had many requests to share the recipe (Harvest Fatoosh Salad) and offer whole Hourani berries to our customers. So, here we go!

Harvest Fatoosh Style Salad

Serves six

Ingredients:

1 cup Hourani whole wheat berries, soaked and cooked
1/4 cup freshly squeezed lemon juice (2 lemons)
1/4 cup good olive oil
2 teaspoons flake salt
½ cup sheep’s feta, crumbled or diced
2 minced scallions, white and green parts
1 bunch or about 1/2 cup chopped fresh mint leaves
1 bunch or about 1/2 cup chopped flat-leaf parsley
1/2 firm cucumber, unpeeled and chopped
2 cups seasonal tomatoes, chopped
Freshly ground black pepper

Directions:

Soak the Hourani berries in water for 6-12 hours. Drain and rinse the berries. Place berries in a saucepan with a 1⁄4 tsp salt and enough water to generously cover them. Bring to a boil and turn down to simmer for about 20 minutes until al dente. The grain should be plump and chewy, not hard or mushy. Drain well and place in a large bowl. Drizzle the olive oil, 1 tsp. salt and pepper while still warm. Let cool.

While the berries are cooling, chop the scallions, mint, parsley, cucumber, tomatoes, feta, 1 teaspoon flake salt, and more pepper. Gently mix the herbs, vegetables, and feta into the berries. Squeeze lemon juice and more olive oil if you wish and mix. Season, to taste. Serve at room temperature or cover and refrigerate. Tabbouleh is best enjoyed at room temperature. If refrigerated, let sit for 30 minutes before serving.

Optional - boost nutrition and digestibility

Sprouting the berries

As with all wheat berries, sprouting them before cooking unlocks loads of health benefits.* The germination process breaks down some of the starch, which makes the percentage of nutrients higher.

It also breaks down phytate, a form of phytic acid that normally decreases absorption of vitamins and minerals in the body. So sprouted wheat has more available nutrients than unsprouted grains. Those nutrients include folate, iron, vitamin C, zinc, magnesium, and protein. Sprouted grains also may have less starch and be easier to digest than regular grains. It may help people who are sensitive to digesting grains.

Method
It’s easy. Use a 64 oz. glass Mason jar. Place the berries in the jar and fill the jar with water. The water line should cover the berries by 2-3 inches.

Let sit at room temperature for 12 hours. Drain the water and rinse with clean water, drain again.

Turn the jar on its side. Spread the berries out for maximum air circulation.

It can take anywhere from 6-12 hours to sprout. Depending upon the time of year–warmer temperatures will reduce the amount of time it takes to sprout the berries. Every 6 hours, turn the jar upright, fill with water to wet the grains and drain. Set the jar on its side and spread grains out again to continue the sprouting process.

The berries are considered sprouted when the tip of the root (the radicle) emerges from the berries. When you see tiny white tails emerge, the grain is ready to cook.

Once sprouted, cook immediately per the directions above, or refrigerate for up to 24 hours. Sprouted, uncooked berries can be frozen for up to two months.

*Harvard Health Blog

Recipe: Mediterranean Summer Salad

Mediterranean Summer Salad

By Melinda V. McLain

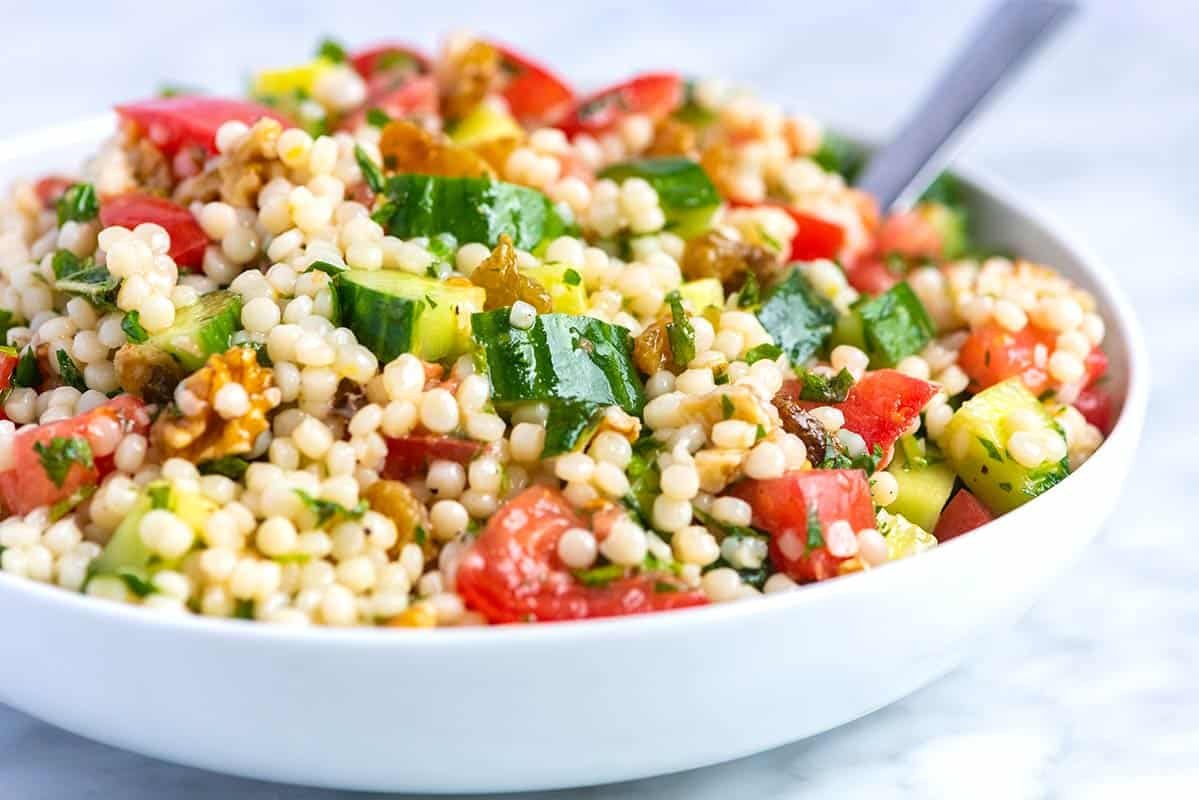
I recently made this salad for a tailgate at the Santa Fe Opera, but it is both perfect for any picnic potluck or substantial enough to serve as a main dish. It is also easy to substitute ingredients for dietary preferences or make it using the bounty of your garden! It keeps well and is easy to serve outside. Quantities below are general, but I try to make sure the ingredients are somewhat evenly distributed, so you get a bit of everything in each bite. Enjoy!

Mediterranean Summer Salad

Serves six

Ingredients:

1 cup Israeli pearl couscous (or farro) or gluten-free couscous

1 large cucumber chopped bite-sized

2 Large heirloom tomatoes chopped or a cup of cherry tomatoes halved

1 small red onion finely chopped

3 oz of Feta cheese (cheaper to chop the brick than buy crumbles)

3 oz Kalamata olives (half a jar from Trader Joe’s) or to taste

2 tbsp Chopped fresh parsley

2 tbsp Olive oil

Fresh lemon juice from two large lemons (we use Meyer lemons from garden)

Salt & Pepper to taste

Optional: Add roasted or broiled chicken cut into bite-sized chunks or chickpeas for veggie and vegan-friendly extra protein. 

Instructions:

  1. Cook the couscous. I learned how to do this from Bob’s Red Mill. Drain it, run cold water over it, and cool it in the fridge in a large bowl that you can also use to serve outside.

  2. Squeeze the juice of two large lemons into the couscous and add a couple of tablespoons of good olive oil. Mix well.

  3. Chop cucumber, tomatoes, feta, olives, onion and parsley. (or whatever veggies you have on hand or in your garden) and toss into the bowl of couscous.

  4. Toss well and make sure ingredients are evenly distributed. Taste it enthusiastically to make sure it’s good! ;-)

  5. Store in fridge until needed so that flavors combine well. It’s often better the next day.

Recipe: Raw Zucchini Salad

SHREDDED ZUCCHINI SALAD (V/GF)

Lightly adapted from Cuisine Niçoise

Serves 4

It’s THAT time of year - everyone’s garden is full of zucchini and the search for new ways to use all this bounty is on! In addition to using a spiralizer to make zoodles and the always popular zucchini bread, we’ve really been enjoying making raw zucchini salads. They are fast, refreshing and easy!

The simplest version is to chop off the ends of the zucchini and grate it (skin and all) into a bowl using a box grater or the grating attachment on a food processor. Toss with lemon juice (we have a Meyer lemon tree that is always loaded) olive oil, salt & pepper. It’s also nice to add garlic salt or a bit of fresh garlic. You can make a lot and keep it in the fridge for a couple of days in a mason jar.

Raw zucchini can also become the base for fancier salads too such as this lovely recipe from Maja Lukic of Veggies & Gin. This recipe adds cherry tomatoes and teaches you how to make a chiffonade of basil - something I can’t wait to try!

Ingredients:

4 zucchini, unpeeled

2 cups cherry tomatoes

1 cup micro radish (or other micro greens)

1/2 cup basil

1 tbsp champagne vinegar 

1 tsp Dijon mustard

1 tbsp fresh lemon juice

2 tbsp olive oil

sea salt, pepper

Instructions:

Wash and trim the zucchini (no need to peel). Grate the zucchini on a box grater or process in a food processor with the shredding attachment. Toss the zucchini with 1/2 tsp salt in a colander. Set aside to drain for 30 minutes. 

Whisk together the champagne vinegar, mustard, lemon juice, and olive oil. 

Wash and halve or quarter the cherry tomatoes. 

Drain the zucchini and squeeze out all of the extra liquid. You can either wrap up the zucchini in a clean kitchen towel and wring it dry or just use your hands for the task. 

Toss the zucchini, cherry tomatoes, and vinaigrette together. Adjust the seasoning, adding more lemon juice or vinegar. It should taste bright and refreshing, not dull or chalky. Add more salt, if needed. 

Chill for at least 20 minutes before serving.

Chiffonade the basil: stack the leaves like a deck of cards, roll them up into a cigar (or yoga mat) and slice into 1/4-inch thick ribbons.

To serve, portion out 1 cup of the salad on each plate. Scatter micro radish and basil over the salad and drizzle with additional olive oil.

Store in the fridge for up to two days.

Note: Substitute white balsamic, white wine, or red wine vinegar for the champagne vinegar, if necessary. The zucchini should be pretty salty after draining so you may not need to add additional salt to the salad.

Spanish Tortilla for Spring

by Kelly Knight, Marketing Manager for The Good Table


Image: Kelly Knight


From the Kitchen

Tortilla Espanol or Spanish tortilla is one of Spain's most popular national dishes, and it is pretty much eggs, potatoes and onions cooked gently in olive oil. It’s basically an omelette, but denser, and used as an appetizer or snack.

I ate it fresh out of the pan, but I’m told it’s even better at room temperature. I’d have it with a side green salad, or breakfast meat if you want a heartier meal.

SPANISH TORTILLA
Recipe adapted from The Mediterranean Dish

INGREDIENTS
10 medium eggs
Salt
1 teaspoon sweet Spanish paprika, optional
1 cup extra virgin olive oil
1 ½ lb russet potatoes (or 2 to 3 russet potatoes), peeled, halved and sliced cross-wise
1 large yellow onion, peeled, halved and sliced cross-wise
4 scallions, trimmed, chopped (both white and green portions)
Optional: a handful of greens like baby spinach or baby kale

DIRECTIONS

  1. In a big bowl, whisk together the eggs, salt, and paprika. Set aside for now.

  2. Prepare a 10-inch oven-proof nonstick skillet or a well-seasoned cast iron skillet. Heat the olive oil in the skillet over medium-high heat until shimmering but not smoking.

  3. Add the potatoes, onions, and scallions to the oil (at first, they won't all seem to fit, but with a little stirring, they'll compress as they cook). Lower the heat immediately to medium-low and watch to control the heat and make sure it continues to gently bubble. Cook for 25 minutes, stirring occasionally, until the potatoes are very tender.

  4. Use a heat-safe strainer over a heat-safe bowl to drain the olive oil (reserve the oil aside for now).

  5. Season the potatoes well with kosher salt and add them to the egg mixture in the bowl.

  6. Turn the oven broiler on.

  7. In the skillet, heat 3 tablespoons of the reserved olive oil over medium heat. Pour in the egg and potato mixture, and gently press to even out the top. Reduce the heat to medium-low. Cook until you see the edges of the omelet begin to set and firm up then put the pan under the broiler to finish cooking. Broil for about 5 minutes, watching carefully until the eggs are cooked through and the top of the omelet browns slightly (see notes if you prefer to finish cooking on stovetop).

  8. Allow the tortilla a few minutes before serving.

  9. To serve, invert the tortilla onto a large serving platter (you may need to loosen the edges using a spatula). Cut into 6 slices and serve.

Melinda's Favorite Gluten and Grain-Free Bread

From the Kitchen

In our spiritual - and soon our café community - we have a strong commitment to serve foods that are delicious and nutritious, but also meet the various allergy limitations of some members. Of course, one of the most difficult and challenging items on our menu is bread.

Bread is an ancient human food that has significant liturgical significance in Jewish and Christian communities, but it is now a challenging food to offer when so many folks have developed gluten intolerance or are choosing to eat vegan, paleo, or keto.

Amongst clergy colleagues, we’ve had a lot of conversations about how to provide a single loaf that most, if not all, could share together for communion. Here’s my favorite that I regularly bake for our Good Table church community that I found on the blog:  An Edible Mosaic.

It’s basically an egg bread made with almond flower, arrowroot, tapioca starch, and flaxseed meal. It is leavened with salt and apple cider vinegar. You can use coconut oil or ghee, almond milk or cow’s milk if you want to make it vegan. While you may not have all these ingredients in your pantry, they are easily sourced in bulk in natural groceries and may even be readily available through some chain stores. But best of all, it is easy and delicious! And unlike many gluten-free breads, it isn’t “crumbly” or dry and holds together well, making it versatile for many uses.

Image courtesy An Edible Mosaic

Best Paleo Sandwich Bread
by An Edible Mosaic

Prep Time: 10 mins. 

Cook Time: 40-45 mins 

Yield: 1 (8 1/2 x 4 1/2 inch) loaf or 1 8” round, or 4 mini-loaves

Ingredients:

2 cups almond flour

6 tablespoons arrowroot starch

4 tablespoons golden flax seed meal

2 tablespoons tapioca starch

3/4 teaspoon fine salt

3/4 teaspoon baking soda

4 tablespoons ghee or coconut oil, melted and cooled slightly, plus more to grease the baking pan

4 eggs lightly beaten

1/2 cup unsweetened almond milk or cow’s milk

1 1/2 teaspoons apple sider vinegar

Instructions:

1. Preheat oven to 350 degrees, generously grease baking pan

2. Whisk together the almond flour, arrowroot, tapioca starch, flaxseed meal, salt and baking soda in a large bowl

3.  Whisk together the slightly cooled ghee or coconut oil, eggs, “milk”, and vinegar in a medium bowl or large measuring cup. (I melt the ghee in the microwave)

4. Add the wet ingredients to the dry ingredients all at once and stir until combined, but do not over-mix (if you stir it too much, it will not rise)

5. Immediately pour batter into the prepared pan and bake until a toothpick inserted in the center comes our clean, about 40-45 minutes (depending on the pan.)

6. Cool on a wire rack before slicing and serving. Freezes well and keeps in the fridge for up to five days.

Enjoy!

Rainy Day Biscuits

by Kelly Knight, Marketing Manager for The Good Table

From the Kitchen

I love a biscuit. Flaky, buttery, warm from the oven… there’s nothing better than a fresh biscuit. My partner though is gluten-free, and that makes biscuiting rather tricky. Until I discovered this amazing, one-bowl recipe from Zen Belly! The biscuits are denser than a wheat flour biscuit, but really delightful as a base for eggs benedict, or even just butter and jam. If you’re gluten-free or paleo, I’d recommend giving these a try. I made some today, and it was a lovely treat!

Paleo biscuit with butter and jam

Paleo biscuit with butter and jam

Rainy Day Biscuits
by Simone Miller of Zen Belly

Yield: 6 large biscuits/12 small biscuits

INGREDIENTS
2 1/2 cups almond flour
3/4 cup arrowroot flour
1/2 teaspoon sea salt
1/2 teaspoon baking soda
4 tablespoons cold butter (frozen if possible)
2 tablespoons honey
2 eggs

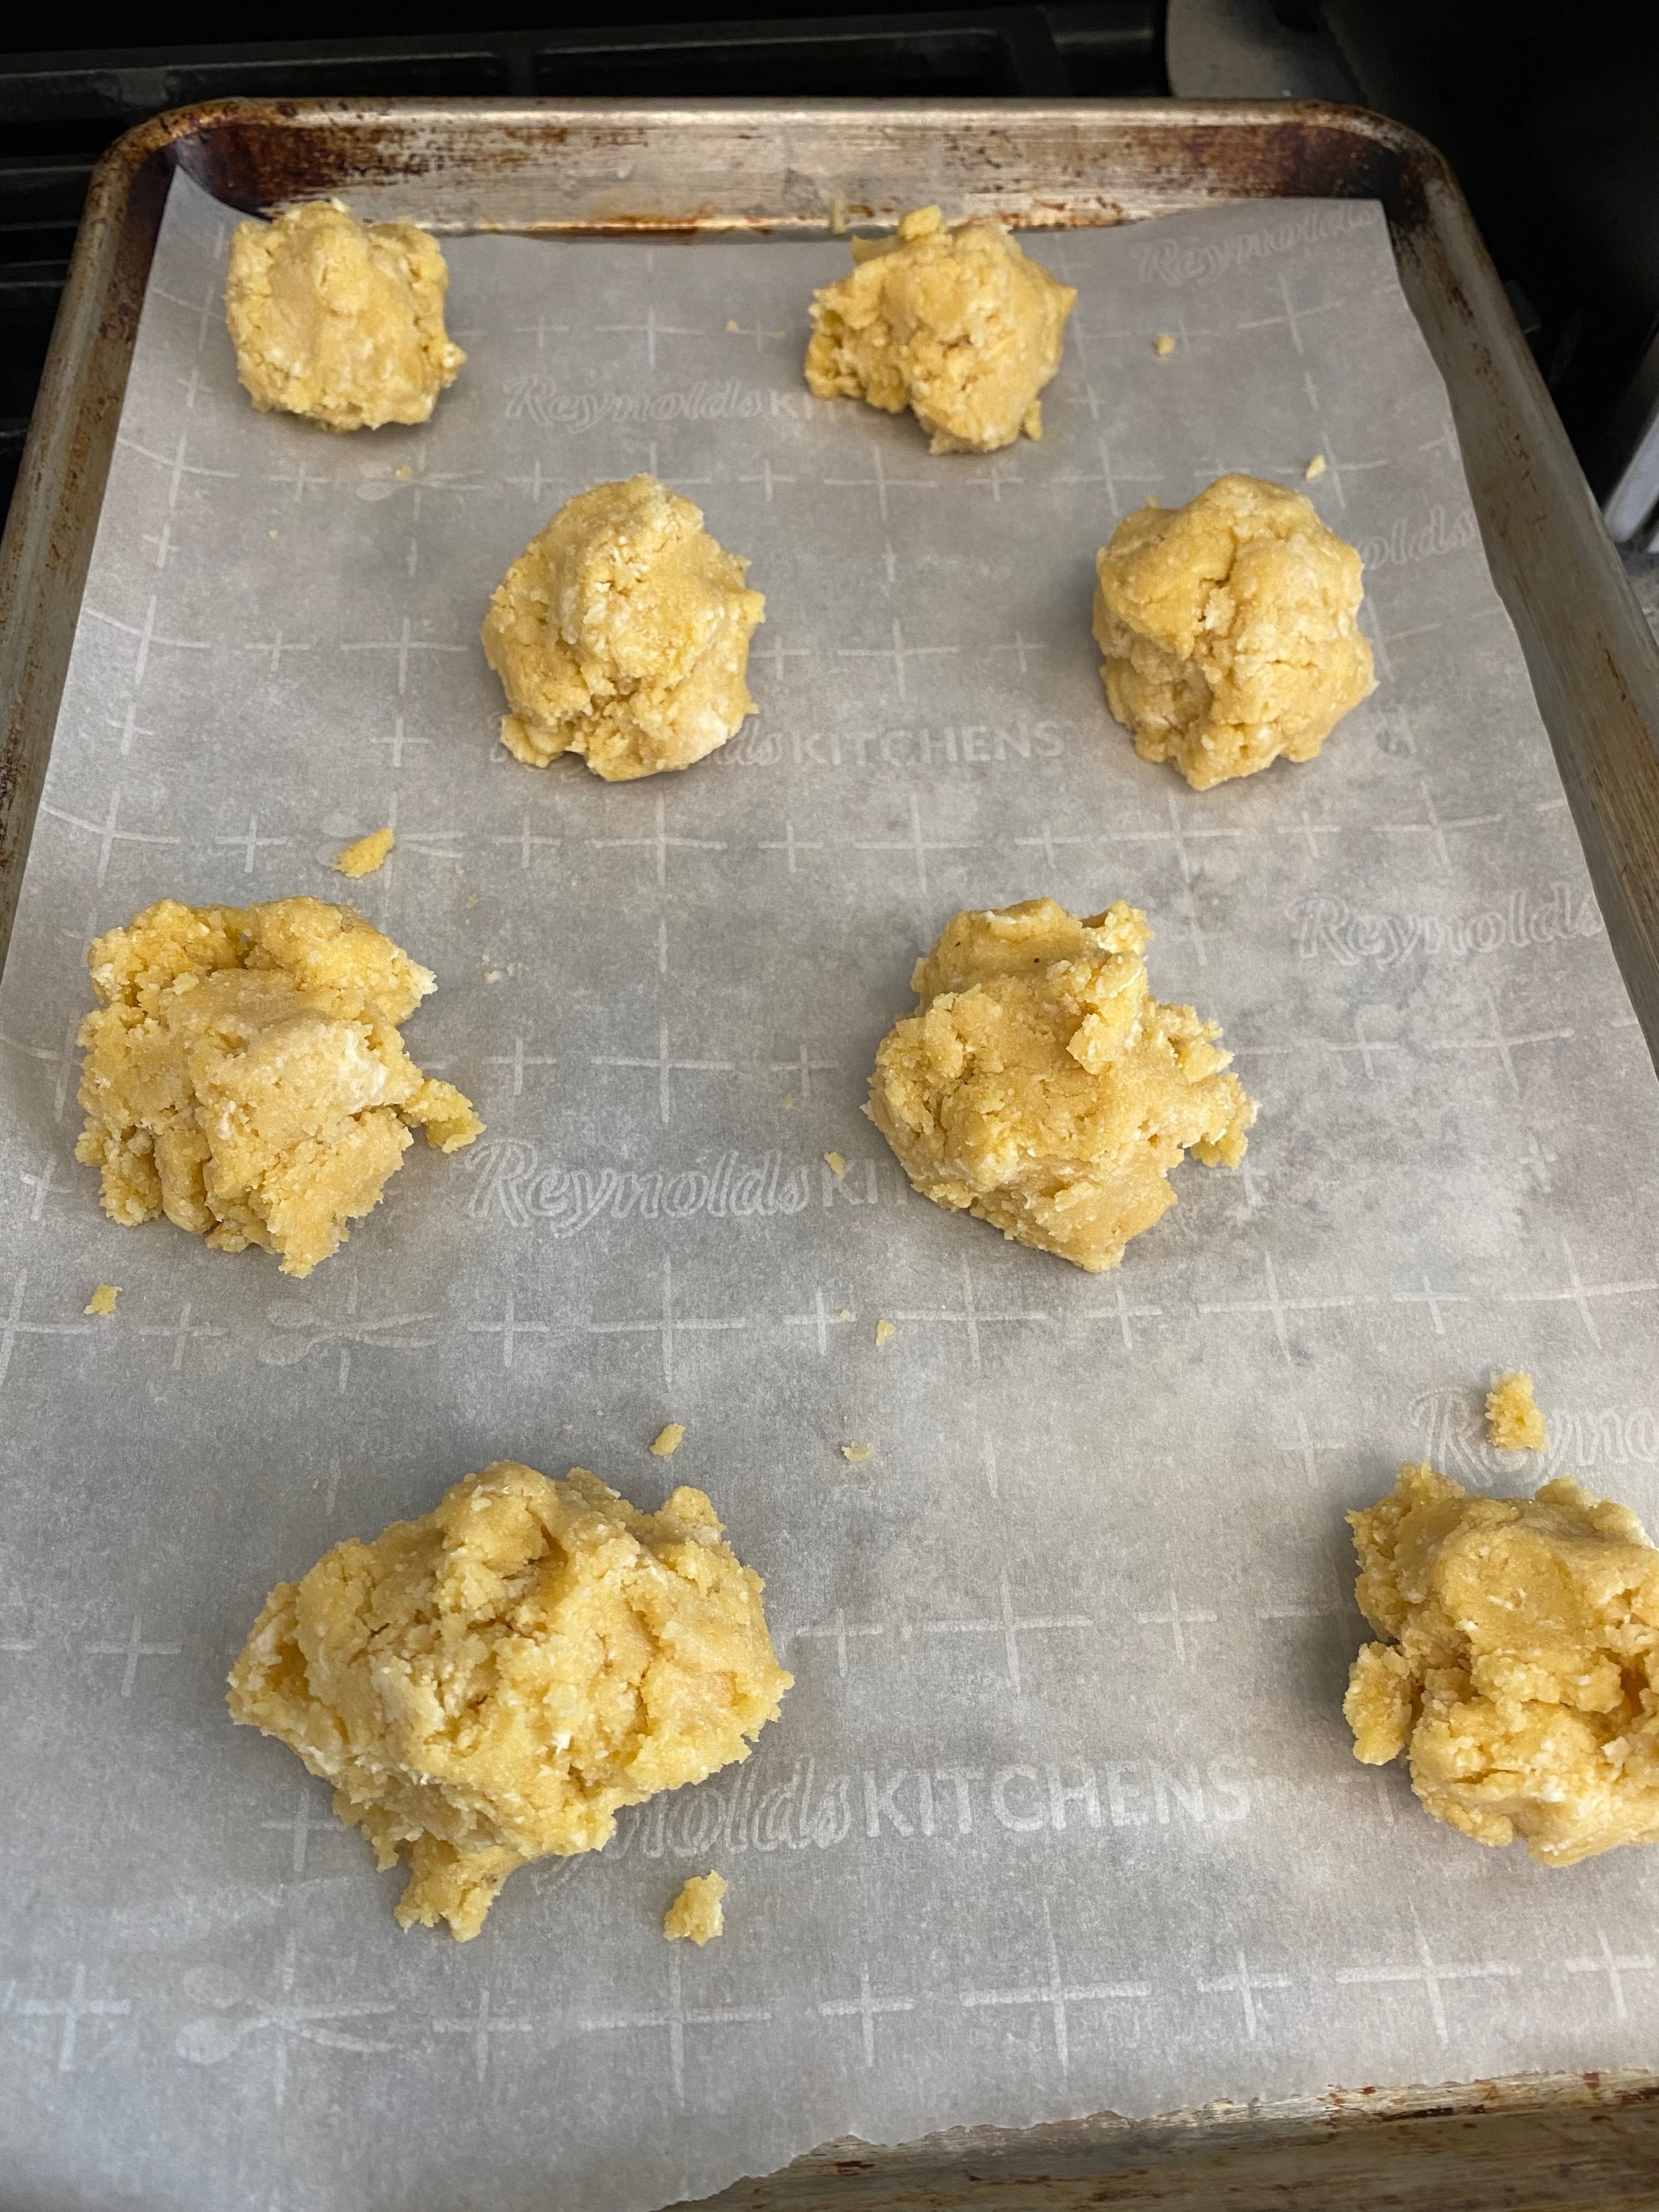
Ready to go into the oven!

DIRECTIONS

  1. Preheat oven to 350ºF and line a baking sheet with parchment paper.

  2. In a large mixing bowl, whisk to combine the almond flour, arrowroot, salt and baking soda. 

  3. Cut the butter into 4-5 pieces and cut into the dry ingredients with a pastry cutter or 2 knives. You’ll want the result to look like coarse crumbs, no larger than pea sized. (Kelly’s tip: I freeze the butter, then grate it with a box grater. It’s fun and easy, and I get great results.)

  4. In a small bowl, whisk together the honey and eggs.

  5. Gently mix into the dry ingredients, but try not to over mix. You want it just to come together.

  6. Drop the batter onto your prepared sheet with a large spoon. It helps to dampen your hands to shape them a bit- the dough is sticky. 

  7. Bake for about 15 minutes, until golden brown and done in the center.

Yum!