Posts tagged Vegan Recipe
Recipe: Shredded Fall Greens with Sherry Thyme Vinaigrette & Hazelnuts

In the Kitchen:

As the leaves turn golden and the air becomes crisp, it’s time to embrace the hearty and rich flavors of fall. This recipe for Shredded Fall Greens with Sherry Thyme Vinaigrette & Hazelnuts is the perfect way to celebrate the season. The dish is both vibrant and nourishing, offering a delicious balance of earthy, nutty, and tangy flavors. It’s not only vegan but also packed with nutrients, making it a wonderful addition to your autumn table.


Ingredients:

For the Salad:

  • 2 cups shredded kale (Tuscan or curly)

  • 2 cups shredded Brussels sprouts

  • 1 cup radicchio, thinly sliced

  • 1 small apple, thinly sliced (optional for a hint of sweetness)

  • 1/3 cup toasted hazelnuts, roughly chopped

  • 1/4 cup dried cranberries (optional for added color and sweetness)

For the Sherry Thyme Vinaigrette:

  • 1/4 cup extra virgin olive oil

  • 2 tbsp sherry vinegar

  • 1 tsp Dijon mustard

  • 1 tbsp fresh thyme leaves (or 1 tsp dried thyme)

  • 1 small shallot, finely minced

  • 1 clove garlic, finely minced

  • Salt and black pepper to taste

  • 1 tsp maple syrup (optional for a touch of sweetness)


Instructions:

1.   Prepare the Greens: Start by prepping your fall greens. Rinse the kale, Brussels sprouts, and radicchio thoroughly. Pat dry with a towel. Using a sharp knife or food processor, shred the kale and Brussels sprouts into thin strips. Thinly slice the radicchio and apple (if using). Toss all the greens together in a large mixing bowl to create a colorful base for your salad.

2.   Toast the Hazelnuts: Toast the hazelnuts to enhance their natural flavor and crunch. Heat a small, dry skillet over medium heat. Add the hazelnuts and toast them for about 5 minutes, stirring frequently to avoid burning. Once they’re fragrant and lightly browned, remove from heat, let cool, and roughly chop them. Set aside.

3.   Make the Vinaigrette: In a small bowl or jar, whisk together the olive oil, sherry vinegar, Dijon mustard, thyme leaves, minced shallot, and garlic. Season with salt and pepper to taste. If you prefer a slightly sweeter dressing, add the optional maple syrup. Adjust the seasoning to your liking.

4.   Dress the Salad: Pour the sherry thyme vinaigrette over the shredded greens. Toss well to ensure all the leaves are evenly coated. The vinaigrette should help soften the kale and Brussels sprouts slightly, making them more tender without losing their fresh crunch.

5.   Add the Toppings: Top the dressed greens with the toasted hazelnuts, dried cranberries, and apple slices for extra texture and flavor. The hazelnuts add a delightful nuttiness that pairs perfectly with the earthy greens, while the cranberries and apples provide a touch of sweetness and tartness.

6.   Serve: Serve immediately for a crisp and fresh salad, or let it sit for 10–15 minutes to allow the flavors to meld and the greens to soften further. This salad makes a great side dish for a cozy fall meal or can be enjoyed as a light, satisfying lunch.


Pro Tips:

Make it a meal: Add some protein like roasted chickpeas or grilled tempeh to make this salad a more substantial main course.

Storage: If you’re making this ahead, keep the dressing and greens separate until just before serving to maintain their crispness.

Nut alternative: If you’re allergic to hazelnuts, swap them out for toasted almonds or walnuts for a similar crunchy texture.


Why You’ll Love This Recipe

This salad is the epitome of autumn in a bowl. The combination of hardy greens with the sweet and nutty vinaigrette creates a dish that is packed with nutrients and bursting with flavor. The kale and Brussels sprouts are rich in vitamins A, C, and K, while the hazelnuts provide healthy fats and protein. The sherry thyme vinaigrette ties it all together with its herbaceous, tangy, and slightly sweet notes.

Whether you’re hosting a fall gathering or just craving a healthy and delicious meal, this Shredded Fall Greens with Sherry Thyme Vinaigrette & Hazelnuts is sure to be a crowd-pleaser!


Looking for some fresh locally sourced ingredients to take this recipe to the next level? Visit the Planting Justice El Sobrante Farmer’s Market open every Sunday from 10 AM - 2 PM!

In the Kitchen: Spring Apple & Fennel Salad

Spring Apple & Fennel Salad

In the Kitchen:

Embrace the vibrant flavors of spring with our refreshing Vegan Spring Apple and Fennel Salad, perfect for Easter Sunday festivities. Bursting with crisp apples, delicate fennel, and peppery arugula, this salad celebrates the season's bounty. Complemented by the crunch of walnuts and the sweetness of dried cranberries, every bite offers a symphony of textures and tastes. Drizzled with a zesty lemon-maple dressing, this salad is a delightful addition to your springtime table, bringing freshness and color to your Easter feast.

Image from pexels.

Servings: 4

Ingredients:

  • 2 crisp apples, thinly sliced

  • 1 fennel bulb, thinly sliced

  • 4-6 radishes, thinly sliced

  • 1 cup arugula leaves

  • 1/4 cup fresh parsley leaves, chopped

  • 1/4 cup walnuts, chopped

  • 1/4 cup dried cranberries

  • 2 tablespoons lemon juice

  • 2 tablespoons extra virgin olive oil

  • 1 tablespoon maple syrup

  • Salt and pepper to taste

Instructions:

  1. Prepare the Apples, Fennel, and Radishes:

    • Wash the apples, fennel bulb, and radishes thoroughly.

    • Remove the core from the apples and slice them thinly. Place the slices in a large mixing bowl.

    • Trim the fronds from the fennel bulb and slice it thinly, including some of the tender stalks. Add them to the mixing bowl with the apples.

    • Trim the tops and bottoms of the radishes, then thinly slice them. Add to the mixing bowl with the apples and fennel.

  2. Prepare the Dressing:

    • In a small bowl, whisk together the lemon juice, extra virgin olive oil, maple syrup, salt, and pepper until well combined. Adjust seasoning to taste.

  3. Assemble the Salad:

    • Pour the dressing over the sliced apples, fennel, and radishes in the mixing bowl. Toss gently to coat the slices evenly with the dressing.

  4. Add Additional Ingredients:

    • Add the arugula leaves, chopped parsley, walnuts, and dried cranberries to the mixing bowl with the dressed apples, fennel, and radishes.

  5. Toss and Serve:

    • Gently toss all the ingredients together until they are evenly distributed and coated with the dressing.

  6. Serve:

    • Transfer the salad to a serving platter or individual plates.

    • Optionally, garnish with additional chopped walnuts or parsley for extra flavor and presentation.

  7. Enjoy:

    • Serve the vegan Spring Apple, Fennel, and Radish Salad immediately as a refreshing and flavorful side dish for your Easter Sunday celebration. It pairs wonderfully with a variety of main courses and is sure to be a hit with vegans and non-vegans alike, bringing the vibrant essence of spring to your table.


Need some more vegan options for friends & relatives. Check out Our Post about hosting vegans for the holidays!

Recipe: Verde Vegan or Chili Con Carne

Recipe:

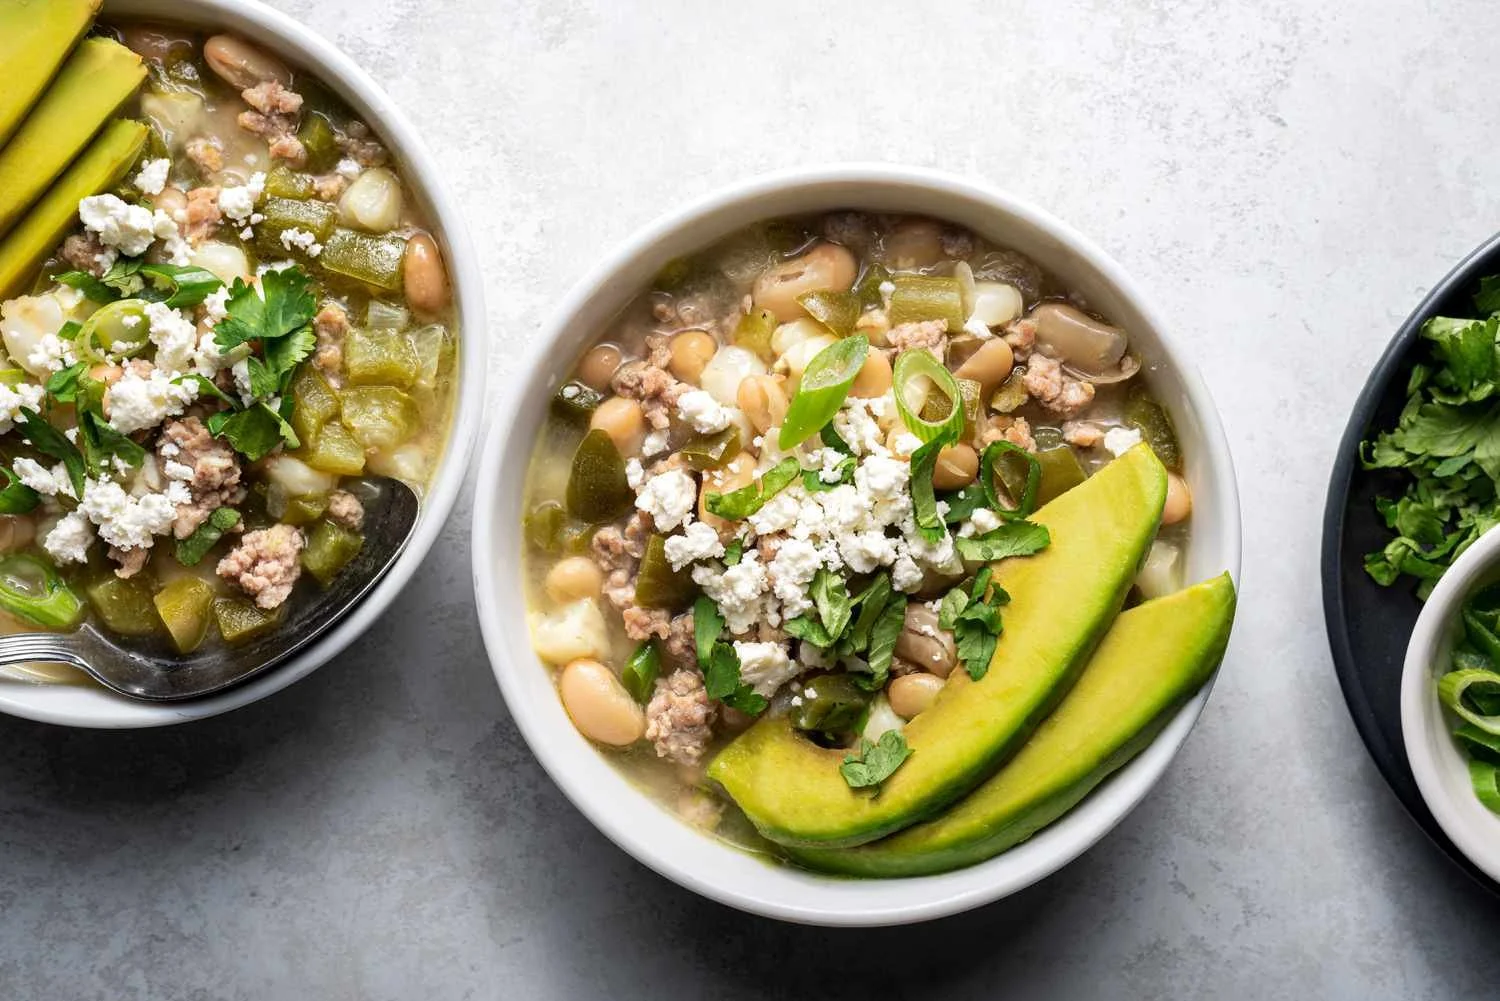
A green chili recipe, whether prepared with meat or as a vegan dish, offers a burst of flavors and textures that make it absolutely delicious in its own unique way.

 In the meat-based version, succulent ground beef or diced pork adds a rich and hearty element to the dish. The meat is perfectly seasoned with aromatic spices like cumin and chili powder, creating a savory, umami depth that complements the mild heat of the green chilies. As the meat simmers with tomatoes and beans, it absorbs the flavors, becoming tender and juicy. Topped with melted cheddar cheese and a dollop of sour cream, it's a comforting, satisfying bowl of warmth that's ideal for meat lovers.

On the other hand, the vegan version of green chili offers a delightful medley of plant-based ingredients. Diced tomatoes and green chilies create a tangy and slightly spicy base, while black beans and pinto beans contribute a creamy, hearty texture that is both filling and nutritious. The seasoning, including ground cumin and chili powder, infuses the dish with a robust, earthy flavor. The addition of sweet corn and lime juice adds a refreshing and zesty dimension. Vegan sour cream and avocado slices provide a creamy contrast that makes every spoonful a harmonious blend of flavors and a visual feast for the senses.

In both versions, what truly makes green chili delicious is its adaptability. You can adjust the level of spiciness to suit your taste, making it as mild or as fiery as you prefer. Plus, the green chili's versatility allows for personal touches like garnishing with fresh cilantro or customizing with your favorite toppings.

Whether you savor the hearty, meaty goodness of the traditional recipe or opt for the vibrant, plant-based alternative, green chili has a way of warming your heart and your palate. It's a dish that brings people together over shared bowls, providing comfort and satisfaction regardless of dietary preferences. The deliciousness of green chili transcends culinary boundaries, making it a beloved choice for anyone seeking a flavorful and soul-warming meal.

Verde Vegan Chili


Ingredients:
·      2 tablespoons vegetable oil
·      1 large onion, diced
·      3 cloves garlic, minced
·      2 cans (14 ounces each) diced green chilies
·      1 can (14 ounces) diced tomatoes
·      1 can (14 ounces) black beans, drained and rinsed
·      1 can (14 ounces) pinto beans, drained and rinsed
·      2 cups vegetable broth
·      2 teaspoons ground cumin
·      1 teaspoon chili powder
·      Salt and pepper to taste
·      1 cup corn kernels (fresh or frozen)
·      Juice of 1 lime
·      Chopped fresh cilantro (optional, for garnish)
·      Sliced avocado (optional, for garnish)
·      Vegan sour cream (optional, for garnish)

Instructions:
-  In a large pot or Dutch oven, heat the vegetable oil over medium heat. Add the diced onion and minced garlic, and sauté until the onion is translucent and fragrant.
- Stir in the diced green chilies, diced tomatoes, black beans, pinto beans, vegetable broth, ground cumin, chili powder, salt, and pepper.
-  Bring the mixture to a simmer, then reduce the heat to low, cover, and let it simmer for about 30-40 minutes, stirring occasionally.
- About 10 minutes before serving, add the corn kernels and lime juice to the pot. Stir well and continue to simmer until the corn is heated through.
- Taste and adjust the seasonings as needed. If you like it spicier, you can add more chili powder or a dash of hot sauce.
- Serve the vegan green chili hot, garnished with chopped fresh cilantro, sliced avocado, and vegan sour cream if desired. Enjoy!


Verde Chili Con Carne

Ingredients:
·      1 pound (450g) lean ground beef or diced pork
·      2 tablespoons vegetable oil
·      1 large onion, diced
·      3 cloves garlic, minced
·      2 cans (14 ounces each) diced green chilies
·      1 can (14 ounces) diced tomatoes
·      1 can (14 ounces) black beans, drained and rinsed
·      1 can (14 ounces) pinto beans, drained and rinsed
·      2 cups chicken or beef broth
·      2 teaspoons ground cumin
·      1 teaspoon chili powder
·      Salt and pepper to taste
·      1 cup shredded cheddar cheese (optional, for garnish)
·      Sour cream (optional, for garnish)
·      Chopped fresh cilantro (optional, for garnish) 

Instructions:
- In a large pot or Dutch oven, heat the vegetable oil over medium heat. Add the diced onion and minced garlic, and sauté until the onion is translucent and fragrant.
- Add the ground beef or diced pork to the pot and cook until browned, breaking it apart with a spatula as it cooks. Drain any excess fat if necessary.
- Stir in the diced green chilies, diced tomatoes, black beans, pinto beans, chicken or beef broth, ground cumin, chili powder, salt, and pepper.
- Bring the mixture to a simmer, then reduce the heat to low, cover, and let it simmer for about 30-40 minutes, stirring occasionally.
- Taste and adjust the seasonings as needed. If you like it spicier, you can add more chili powder or a dash of hot sauce.
-  Serve the green chili hot, garnished with shredded cheddar cheese, sour cream, and chopped fresh cilantro if desired. Enjoy!


Recipe: Summer Breeze Veggie Medley Salad

Recipe:

Burned out on summer BBQ? With the impending heatwave coming to Contra Costa you may find yourself needing to cool off with a refreshing Summer Salad. If you find yourself longing for a change of pace, a respite from the smoky flavors and sizzling meats, then look no further. It's time to embrace a cooler, fresher alternative that will invigorate your taste buds and rejuvenate your summer dining experience.

Ingredients:
2 cups mixed salad greens (e.g., lettuce, arugula, spinach)
1 cup cherry tomatoes, halved
1 cup cucumber, diced
1 cup sweet corn kernels (fresh or canned)
1 bell pepper (any color), diced
1 small red onion, thinly sliced
1 avocado, sliced
1/4 cup fresh basil leaves, torn
1/4 cup fresh mint leaves, torn
1/4 cup crumbled feta cheese (optional) 

For the dressing:
3 tablespoons extra virgin olive oil
2 tablespoons fresh lemon juice
1 clove garlic, minced
1 teaspoon Dijon mustard
Salt and pepper to taste

Instructions:
1.     In a large salad bowl, combine the mixed salad greens, cherry tomatoes, cucumber, sweet corn, bell pepper, red onion, avocado, basil, and mint.
2.     In a small bowl, whisk together the olive oil, lemon juice, minced garlic, Dijon mustard, salt, and pepper until well combined.
3.     Drizzle the dressing over the salad and toss gently to coat all the ingredients.
4.     If desired, sprinkle crumbled feta cheese over the salad for added flavor.
5.     Let the salad sit for a few minutes to allow the flavors to meld together.
6.     Serve the summer veggie medley salad as a refreshing and nutritious side dish or add grilled chicken, shrimp, or tofu for a complete meal.

Enjoy your fresh and vibrant summer salad!

Note: Feel free to modify the recipe based on your personal preferences and the availability of vegetables in your area. You can also add other seasonal vegetables such as zucchini, radishes, or green beans for more variety.

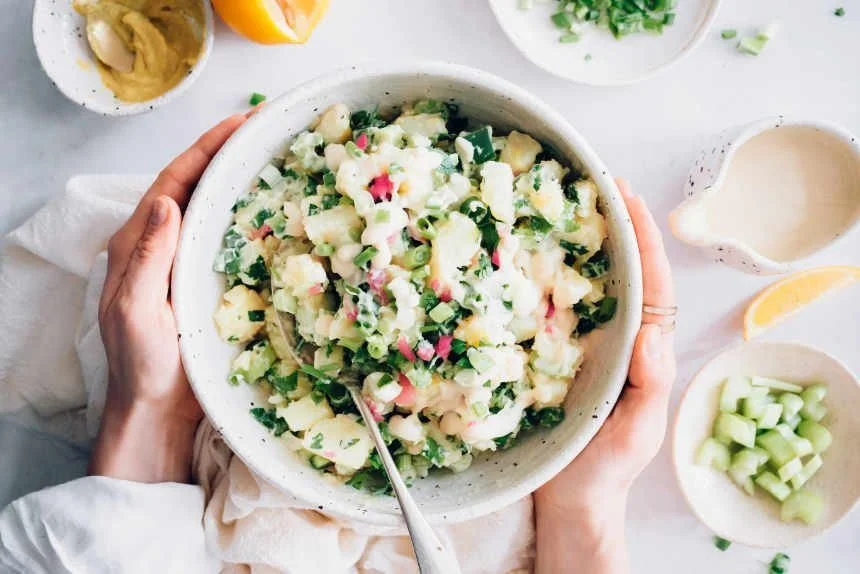
Recipe: Creamy Vegan Potato Salad

Recipe

No special occasion or equipment is needed for such undetectably vegan goodness. Bring it to a potluck or party or serve it with homemade mayo during your next BBQ!

Link to the Original Recipe from nutriciously.com

Ingredients

2 lbs white potatoes, peeled and chopped (900 g)

  • ¾ cup celery, chopped (170 g)

  • ½ cup parsley, finely chopped (15 g)

  • ½ cup dill pickles, chopped (77 g)

  • 1 green bell pepper, finely chopped

  • 2 green onions, finely chopped

  • 1 tbsp mustard (optional)

  • Radishes, chopped (optional)

  • ¾-1 cup vegan mayo

Instructions

Place the peeled and cubed potatoes into a large pot and cover with water. Bring to a boil, then reduce heat and let them cook for 15 minutes.

  1. Once the potatoes are fork-tender, drain and let them cool.

  2. Meanwhile, prepare the rest of your ingredients.

  3. Make the cashew mayo by placing all ingredients in a high-speed blender and blend until smooth. Adjust to taste with salt and nutritional yeast; add more water if you want a thinner consistency.

  4. Add cooked potatoes, celery, parsley, pickles, bell pepper, and green onion to a large bowl.

  5. Top with your vegan mayo and mix until well combined with a large spoon. Adjust to taste with salt, lemon juice and mustard.

  6. Serve immediately or cover and refrigerate for at least an hour to allow the flavors to blend and taste even better!

Notes

  • If you don’t like dill pickles, celery or bell peppers, you can go straight to a potato-and-onion-version instead or choose different veggies to add into your potato salad.

  • To add a bit more zing, use some pickle juice to thin out the mayo.

  • This vegan potato salad keeps in the fridge for up to 5 days but tastes best within the first 3-4 days.

  • Feel free to use store-bought vegan mayo for this recipe.

Recipe: Mashed Potato Pizza Crust (Vegan & Easy)

Recipe

Do you love pizza and are ready for a twist on the Italian classic? Try this vegan mashed potato pizza crust! It takes only 10 minutes of hands-on prep time, is really low in calories and totally grain-free.

Link to the Original Recipe from nutriciously.com

Ingredients

Potato Pizza Crust

  • 1 ½ lb potatoes, peeled and cubed (680 g)

  • 2 cups cauliflower florets (200 g)

  • 5 tablespoons potato starch

  • Salt and pepper to taste

  • Pinch of nutritional yeast (optional)

Toppings

  • Green hummus

  • ½ cup cooked chickpeas (80 g), drained

  • ½ medium zucchini (100 g), thinly sliced

  • 1 large tomato, thinly sliced

  • 1-2 button mushrooms, thinly sliced

  • ½ red onion, thinly sliced

  • 1 cup fresh arugula (20 g)

  • Salt and pepper to taste

Instructions

Make the Potato Pizza Crust

  1. Using a medium-sized pot, steam your cubed potatoes and cauliflower florets for around 25 minutes until soft and fork-tender. 

  2. Then, preheat the oven to 430° F (220° C) and line two baking sheets with parchment paper.

  3. Once the potatoes and cauliflower are done cooking, drain them well. Using an immersion blender, fork or food processor, mash them until completely smooth.

  4. Add potato starch, salt, pepper and mix until well-combined.

  5. Using a wet spatula, thinly spread the potato mixture onto your prepared baking sheets, forming two pizza crusts.

  6. Place the baking sheets into the oven and bake your potato crust for 15-20 minutes until lightly golden.

Assemble the Veggie Pizza

  1. Once this time has elapsed, remove the potato pizza crust from the oven. Spread with hummus and top with chickpeas, zucchini, tomato, mushrooms and onion.

  2. Lightly season your potato veggie pizza with salt and pepper and return to the oven to bake for another 15 minutes.

  3. Top with fresh arugula, nutritional yeast or vegan parmesan if desired, then serve immediately. Enjoy

Recipe: Quinoa Veggie Bowl

Quinoa Veggie Bowl

An easy, plant based meal that celebrates the bounty of spring. This Quinoa Veggie Bowl will leave you feeling healthy and satisfied. A big dollop of pesto brings tons of bright, fresh flavor.

Link to the Original Recipe from www.veggieinspired.com

Ingredients

  • 1 ½ cups dry quinoa

  • 2 ½ cups water or vegetable broth

  • 1 bunch asparagus woody bottom stems snapped off or trimmed

  • 1 bunch radishes halved or quartered (stems and leaves removed)

  • 2 teaspoons olive oil divided (see notes for an oil-free option)

  • salt and pepper to taste

  • 2 handfuls fresh spinach leaves

  • ½ cup chopped or slivered raw almonds

  • 1 recipe Pumpkin Seed Pesto

Instructions

  • Preheat the oven to 400°F.

  • You can use your favorite store bought pesto OR make the pesto from scratch. You can make the pesto ahead of time if you wish and keep in the fridge. (click here for Pumpkin Seed Pesto recipe)

  • Toss the radishes with 1 teaspoon of olive oil and a sprinkle of salt and pepper. Spread on a rimmed baking sheet in one even layer.

  • Spread the asparagus spears out in one even layer on another baking sheet. Drizzle with 1 teaspoon olive oil and sprinkle with salt and pepper.

  • Roast both pans for 20 to 25 minutes until the vegetables are browned and tender. Stir the veggies on the pan and spread back out after 15 minutes.

  • While the vegetables are roasting, place quinoa and water (or vegetable broth for added flavor) in a medium pot and bring to a boil. Turn down heat to a simmer, cover, and cook for about 15 minutes until the water is absorbed and the quinoa is cooked through. Fluff with a fork.

  • To assemble the bowls, place a small handful of spinach in a bowl, top with quinoa, roasted veggies, almonds, and a dollop of pesto.

Notes

~ The pesto can be made ahead of time and kept in an air-tight container in the fridge for up to 5 days.

~ Rinse the quinoa well before cooking to remove any debris or bitterness.

~ Fluff the quinoa with a fork when it’s done. Do not stir it with a spoon…that will just make it sticky and mushy.

~ Use rice, couscous, orzo or any grain you love instead of quinoa to mix it up.

~ A drizzle of oil on the vegetables will help them brown and caramelize and produce a richer flavor. It will also prevent them from sticking to the pan.

~ For an oil-free option, use a squeeze of lemon juice or dash of tamari instead. Place a sheet of parchment paper on the baking sheet under the veggies to prevent sticking.

~ Add some white beans or baked tofu for an added protein boost.

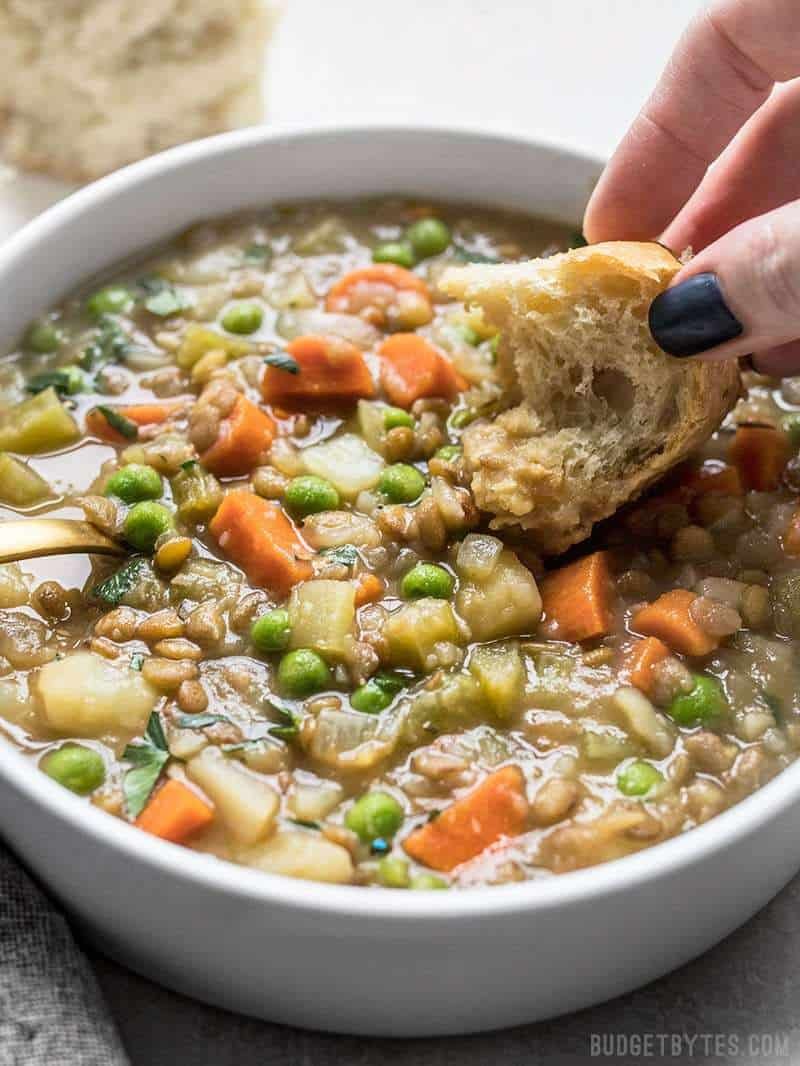
Recipe: Vegan Winter Lentil Stew

Vegan Winter Lentil Stew

A rich and hearty medley of vegetables, lentils, and herbs makes this freezer-friendly Vegan Winter Lentil Stew the perfect cold-weather comfort food.

Link to the Original Recipe from www.budgetbytes.com

Ingredients

  • 2 Tbsp olive oil ($0.32)

  • 1 yellow onion

  • 4 cloves garlic

  • 4 carrots (about 1/2 lb.)

  • 4 stalks celery

  • 2 lbs potatoes

  • 1 cup brown lentils

  • 1 tsp dried rosemary

  • 1/2 tsp dried thyme

  • 2 Tbsp Dijon mustard

  • 1.5 Tbsp soy sauce

  • 1 Tbsp brown sugar

  • 6 cups vegetable broth

  • 1 cup frozen peas

Instructions

  • Dice the onion and mince the garlic. Add the olive oil, onion, and garlic to a large soup pot and begin to sauté over medium heat.

  • While the onion and garlic are sautéing, dice the celery, then add it to the pot and continue to sauté. As the celery, onion, and garlic are sautéing, peel and chop the carrots into half rounds. Add the carrots to the pot and continue to sauté.

  • As the onion, garlic, celery, and carrots are sautéing, peel and cube the potatoes into 3/4 to 1-inch pieces. Add the cubed potatoes to the pot along with the lentils, rosemary, thyme, Dijon, soy sauce, brown sugar, and vegetable broth.

  • Briefly stir the ingredients to combine, then place a lid on the pot, turn the heat up to high, and bring the stew up to a boil. Once it reaches a boil, turn the heat down to low and let it simmer for 30 minutes, stirring occasionally.

  • Toward the end of the simmer time, when the potatoes are very soft, begin to mash the potatoes a bit as you stir. This will help thicken the stew.

  • Finally, after 30 minutes, stir in the frozen peas and allow them to heat through. Taste the stew and add salt if needed (this will depend on the salt content of your broth, I did not add any extra). Serve hot and enjoy!

Recipe: Vegan Salted Espresso Brownie Cookies

Vegan Salted Espresso Brownie Cookies

The most decadent & fudgy Vegan Salted Espresso Brownie Cookies! Also known as vegan brookies, these double chocolate chip cookies feature a brownie-like batter mixed with dark, aromatic espresso & topped with flaky sea salt for the ultimate dairy-free & eggless dessert!

Link to the Original Recipe from www.shortgirltallorder.com

Ingredients

  • ¾ cup all purpose flour

  • 1 Tablespoon finely ground espresso

  • ½ teaspoon salt

  • ¼ teaspoon baking soda

  • ½ cup dark chocolate chips melted

  • ¼ cup coconut oil melted

  • ¼ cup organic white sugar

  • 2 Tablespoons brown sugar

  • 1 flax egg *1 Tablespoon (8 grams) ground flaxseed mixed with 3 Tablespoons water, left to sit 5-10 minutes until thick*

  • 1 teaspoon vanilla bean paste or vanilla extract

  • ¼ cup chocolate chips optional, to add into mix

  • 1 teaspoon flaky sea salt optional, to top cookies

Instructions

  • Preheat your oven to 350F and place a sheet of parchment paper a large baking pan.

  • First, sift together the all-purpose flour, espresso, salt, and baking soda in a small bowl and set aside.

  • Then, melt the chocolate and coconut oil. Add a few inches of water to a small pan and bring to a simmer. In a separate heatproof bowl, add your chocolate chips and coconut oil. Set the bowl over the pan with simmering water and stir until completely melted and smooth. Remove the bowl of chocolate from the heat and let sit. It's also fine to microwave together in microwave safe bowl, stopping every 20-30 seconds to stir until completely melted.

  • Pour the melted chocolate and coconut oil into a large mixing bowl right after melting. Then, add the white sugar, brown sugar, flax egg, and vanilla bean paste to the bowl and whisk together until combined.

  • Gradually add the bowl of sifted dry ingredients to the larger mixing bowl with wet ingredients and mix until a smooth batter has formed. Use a spatula to scrape the sides and bottom of the bowl and mix one last time to make sure all the dry ingredients are evenly mixed. The batter will be soft and like a brownie batter at this point.

  • If you are adding chocolate chips to the cookies (highly recommended!), add the additional ¼ cup of chocolate chips and fold into the batter with a spatula.

  • Use a cookie/ice cream scooper to form cookie dough balls about 1 Tbsp in size and drop them onto the parchment paper. Make sure to leave enough space between each cookie as they will spread.

  • Bake for 8-9 minutes until cookies are crinkled on the outside, but still soft on the inside. Remove from the oven and let the cookies sit on the baking tray for at least 10 minutes to cool and firm u[ as they will be very soft. After that 10 minute mark, use a spatula to gently remove each cookie and place onto a cooling rack. Once cooled, top with extra flaky sea salt and enjoy!

NOTES

  • Because these cookies are made using coconut oil, it is NOT recommended to chill the dough before baking as this affects the spread of the cookies. If you chill the dough, the cookies will not spread as much and will be thick.

  • Chips or Lily's Dark Chocolate Chips are my favorite. However, if you prefer a sweeter cookie, semi sweet can also work- just make sure it's vegan!

  • Cookies can be stored in a closed container at room temperature for 3-5 days or in the freezer for up to 1 month. Since we are using coconut oil, they do not store as well in the fridge.

  • Recipe very slightly adapted from The Boy Who Bakes Brownie Crinkle Cookies

Recipe: Mushroom Wellington with Rosemary and Pecans

Recipe: Mushroom Wellington with Rosemary and Pecans

Here’s a little number that may come in handy for the holidays – Mushroom Wellington with Rosemary and Pecans. This, my friends the perfect, most elegant, vegan main dish for your Thanksgiving, Christmas or holiday table! And the best part? It is very simple!!!

Link to the Original Recipe

Ingredients

  • 1 box -2 sheets vegan puff pastry, thawed in the fridge overnight. (Use cold-not at room temp)

  • 2 tablespoons olive oil (or butter)

  • 2 pounds mushrooms, sliced, stems OK (except Shiitake stems)

  • 1 large onion, diced

  • 4–6 fat garlic cloves, rough chopped

  • 1 tablespoon chopped fresh rosemary (or sage, or thyme)

  • 1 teaspoon kosher salt

  • 1/4 cup sherry wine ( not sherry vinegar) marsala wine, ruby port (or red wine or white wine) – or leave it out! see notes.

  • 1 teaspoon balsamic vinegar

  • 1 cup chopped, toasted pecans ( or feel free to sub hazelnuts or walnuts)

  • ½ teaspoon pepper

  • 2 teaspoons truffle oil ( optional)

  • OPTIONS -if you want to add cheese, add ½ – 1 cup grated pecorino, gruyere, goat cheese or cream cheese- or use a meltable vegan cheese- or make vegan ricotta!

  • “Egg” wash – use nut milk, cream or melted coconut oil to brush on the pastry. If not worried about it being vegan, whisk an egg with a tablespoon of water.

Instructions

  • Make sure your puff pastry is thawed before you start -cold, but thawed. (Note if it is too warm, it may fall apart, if too cold, it will be too stiff to roll.)

  • Preheat oven to 400F

  • MAKE THE FILLING: Heat oil in an extra-large skillet or dutch oven, over medium-high heat. Add mushrooms, onions, garlic, salt and rosemary and saute, stirring often, until mushrooms release all their liquid. Turn heat down to medium, and continue sauteing until all the liquid has evaporated, be patient, this will take a little time! Once the mushrooms are relatively dry in the pan, splash with the sherry wine and balsamic vinegar and again, sauté on medium heat until all the liquid has cooked off. This is important- you absolutely do not want a watery filling ( it will turn into a mess!). Add the toasted chopped pecans, pepper, truffle oil. Taste, adjust salt to your liking. At this point, you could fold in some cheese if you like.

  • Let the filling cool 15-20 minutes (you could make the filling a day ahead and refrigerate).

  • Fill 2 Puff Pastries: Carefully unroll the puff pastry onto a parchment-lined baking sheet (if it seems stiff, let it thaw a few more minutes until pliable). Place half the filling in a mound along the center (see photo) and working quickly, roll the pastry up, and over, seam side down. Fill and roll the second sheet.

  • Brush with the egg or eggless wash.

  • Score the pastry using a razor blade or sharp knife with your choice of design – cross-hatch, herringbone, leafy vine or just simple diagonal slits.

  • Bake: Place the sheet pan on the middle rack in the oven for 35 minutes, checking at 2o mins, and rotating pan for even browning if necessary. Let the pastry bake until it is a really deep golden color – to ensure it’s done and flaky all the way through. You may need to add 5 more minutes depending on your oven. Convection will help if you have this setting (use it for the last 5-10 minutes) Please, let’s not have any pale pastries!!! Nice and golden!

  • Cool for 5-10 minutes before cutting and serving. Garnish with Rosemary Sprigs. It’s OK to serve at room temp, but warm is best.

  • See notes for making ahead!

NOTES

Feel free to add other veggies to the mushrooms, just as long as the filling is not watery and still has flavor (adjust salt and seasonings!). Roasted parsnips, wilted spinach, roasted sweet potatoes or butternut, sautéed kale, roasted sunchokes ….would all work well here.

Feel free to sub other nuts for the pecans, like toasted walnuts or hazelnuts.

When I made these, I made one roll vegan and one with cheese. Both are good. 😉

If making ahead, I would recommend making the filling ahead, then assemble and bake the day of. OR you can also make and bake the whole thing ahead and reheat ( letting it come to room temp first).  If baking ahead, bake until the puff pastry is cooked through, but not too golden. Let it get golden when reheating. It will look “prettier” baked the day of.

You can leave out the wine altogether, and not replace it with anything. I find it does add another level of complexity, but up to you.