Posts tagged Vegetarian recipe
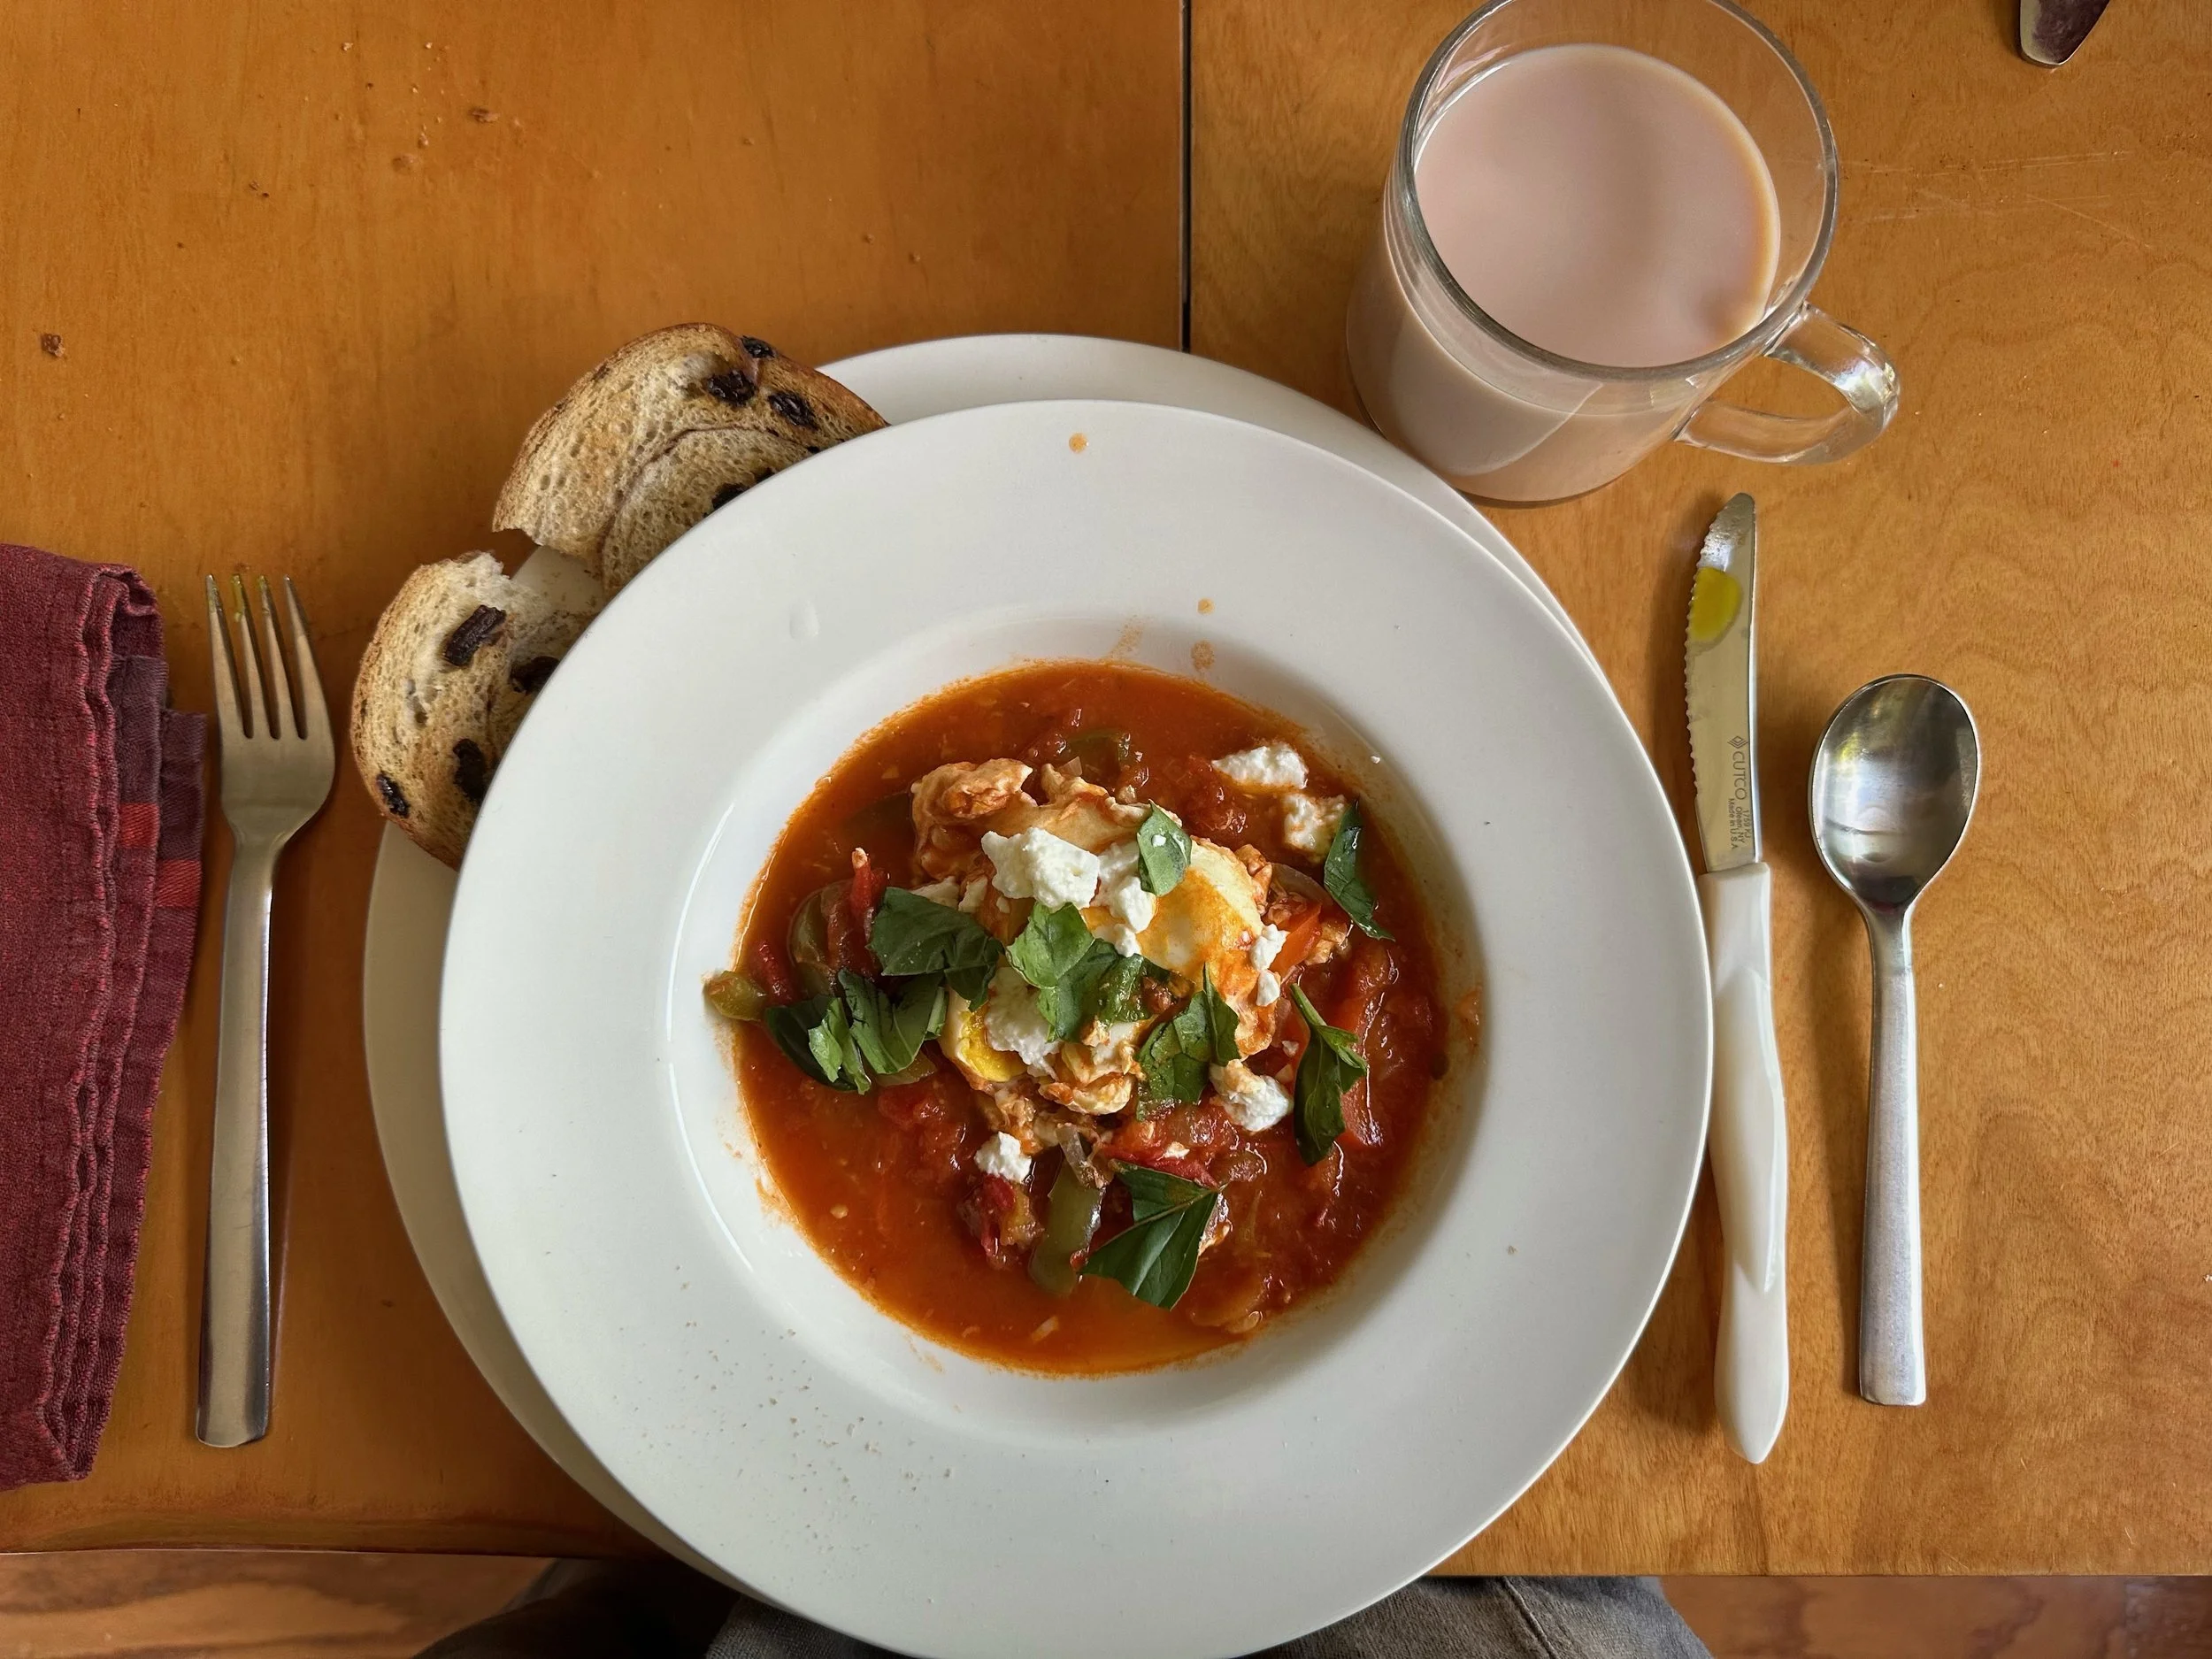
Recipe: Shakshuka with Poached Eggs

Shakshuka with Poached Eggs

Recipe:

This recipe was given to me by Deirdre Davis, chef extraordinaire, who runs Pinoli Farmhouse Kitchen. She adapted it from an Ottolenghi recipe in his book, Jerusalem (2012). Shakshuka is a popular breakfast, brunch, or lunch fare in Israel. Served with crusty bread, it makes a delicious and hardy meal. I can vouch for that!  —Bonnie Hariton

INGREDIENTS (for 6 servings)

□ 1 teaspoon whole cumin seeds, toasted and ground
□ 1 teaspoon whole coriander seeds, toasted and ground
□ 4-5 cloves garlic, about 1 tablespoon, finely chopped
□ 2 large red bell peppers, cut into 1/4" by 2" slices
□ 1 medium white onion, in 1/4" slices
□ 5 cups heirloom tomatoes, chopped
□ 2 tablespoons olive oil
□ 1 heaping tablespoon harissa or Korean gochujang (spicy chili pepper paste)
□ 2 tablespoons tomato paste
□ 3/4 teaspoon salt
□ 6 whole eggs
□ 1/3 cup crumbled feta cheese
□ Several fresh basil leaves, torn in small pieces

INSTRUCTIONS

1.    Toast cumin and coriander seeds together in a small, heavy, dry frying pan (without oil) over medium-high heat until they darken slightly, 1 or 2 minutes. Grind with a mortar and pestle or a spice grinder.

2.    Chop garlic. Chop red bell peppers and onion. Chop tomatoes. Crumble feta. Tear up the basil leaves.

3.    Heat olive oil. Add harissa or gochujang and stir. Add toasted spices and garlic and cook until just fragrant.

4.    Follow with tomato paste and salt. Cook a few more minutes.

5.    Add onions and bell peppers. Stir over medium heat about 6-8 minutes till softened.

6.    Add tomatoes and bring to a simmer. Cook uncovered for about 10 minutes until the sauce thickens to your liking.

7.    Taste for seasoning.

8.    Make 6 little dips in the sauce. Gently break an egg into each dip.

9.    Simmer gently for 8-10 minutes, covered, until the whites are just set and the yolks are as runny or as firm as you prefer.

10. To serve, put some of the sauce and an egg into a bowl. Sprinkle with feta cheese and basil leaves. 

Note:
Leftover sauce keeps well in a glass jar in the refrigerator for several days. For two people, I usually make the entire sauce and poach three eggs the first day, then re-heat leftover sauce and poach three eggs in it the next day.

Recipe: Summer Breeze Veggie Medley Salad

Recipe:

Burned out on summer BBQ? With the impending heatwave coming to Contra Costa you may find yourself needing to cool off with a refreshing Summer Salad. If you find yourself longing for a change of pace, a respite from the smoky flavors and sizzling meats, then look no further. It's time to embrace a cooler, fresher alternative that will invigorate your taste buds and rejuvenate your summer dining experience.

Ingredients:
2 cups mixed salad greens (e.g., lettuce, arugula, spinach)
1 cup cherry tomatoes, halved
1 cup cucumber, diced
1 cup sweet corn kernels (fresh or canned)
1 bell pepper (any color), diced
1 small red onion, thinly sliced
1 avocado, sliced
1/4 cup fresh basil leaves, torn
1/4 cup fresh mint leaves, torn
1/4 cup crumbled feta cheese (optional) 

For the dressing:
3 tablespoons extra virgin olive oil
2 tablespoons fresh lemon juice
1 clove garlic, minced
1 teaspoon Dijon mustard
Salt and pepper to taste

Instructions:
1.     In a large salad bowl, combine the mixed salad greens, cherry tomatoes, cucumber, sweet corn, bell pepper, red onion, avocado, basil, and mint.
2.     In a small bowl, whisk together the olive oil, lemon juice, minced garlic, Dijon mustard, salt, and pepper until well combined.
3.     Drizzle the dressing over the salad and toss gently to coat all the ingredients.
4.     If desired, sprinkle crumbled feta cheese over the salad for added flavor.
5.     Let the salad sit for a few minutes to allow the flavors to meld together.
6.     Serve the summer veggie medley salad as a refreshing and nutritious side dish or add grilled chicken, shrimp, or tofu for a complete meal.

Enjoy your fresh and vibrant summer salad!

Note: Feel free to modify the recipe based on your personal preferences and the availability of vegetables in your area. You can also add other seasonal vegetables such as zucchini, radishes, or green beans for more variety.

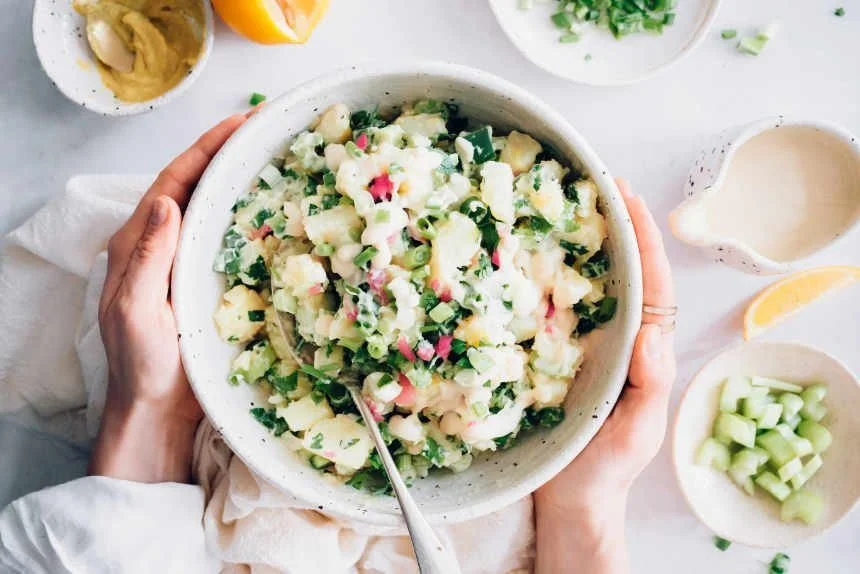
Recipe: Creamy Vegan Potato Salad

Recipe

No special occasion or equipment is needed for such undetectably vegan goodness. Bring it to a potluck or party or serve it with homemade mayo during your next BBQ!

Link to the Original Recipe from nutriciously.com

Ingredients

2 lbs white potatoes, peeled and chopped (900 g)

  • ¾ cup celery, chopped (170 g)

  • ½ cup parsley, finely chopped (15 g)

  • ½ cup dill pickles, chopped (77 g)

  • 1 green bell pepper, finely chopped

  • 2 green onions, finely chopped

  • 1 tbsp mustard (optional)

  • Radishes, chopped (optional)

  • ¾-1 cup vegan mayo

Instructions

Place the peeled and cubed potatoes into a large pot and cover with water. Bring to a boil, then reduce heat and let them cook for 15 minutes.

  1. Once the potatoes are fork-tender, drain and let them cool.

  2. Meanwhile, prepare the rest of your ingredients.

  3. Make the cashew mayo by placing all ingredients in a high-speed blender and blend until smooth. Adjust to taste with salt and nutritional yeast; add more water if you want a thinner consistency.

  4. Add cooked potatoes, celery, parsley, pickles, bell pepper, and green onion to a large bowl.

  5. Top with your vegan mayo and mix until well combined with a large spoon. Adjust to taste with salt, lemon juice and mustard.

  6. Serve immediately or cover and refrigerate for at least an hour to allow the flavors to blend and taste even better!

Notes

  • If you don’t like dill pickles, celery or bell peppers, you can go straight to a potato-and-onion-version instead or choose different veggies to add into your potato salad.

  • To add a bit more zing, use some pickle juice to thin out the mayo.

  • This vegan potato salad keeps in the fridge for up to 5 days but tastes best within the first 3-4 days.

  • Feel free to use store-bought vegan mayo for this recipe.

Recipe: Mashed Potato Pizza Crust (Vegan & Easy)

Recipe

Do you love pizza and are ready for a twist on the Italian classic? Try this vegan mashed potato pizza crust! It takes only 10 minutes of hands-on prep time, is really low in calories and totally grain-free.

Link to the Original Recipe from nutriciously.com

Ingredients

Potato Pizza Crust

  • 1 ½ lb potatoes, peeled and cubed (680 g)

  • 2 cups cauliflower florets (200 g)

  • 5 tablespoons potato starch

  • Salt and pepper to taste

  • Pinch of nutritional yeast (optional)

Toppings

  • Green hummus

  • ½ cup cooked chickpeas (80 g), drained

  • ½ medium zucchini (100 g), thinly sliced

  • 1 large tomato, thinly sliced

  • 1-2 button mushrooms, thinly sliced

  • ½ red onion, thinly sliced

  • 1 cup fresh arugula (20 g)

  • Salt and pepper to taste

Instructions

Make the Potato Pizza Crust

  1. Using a medium-sized pot, steam your cubed potatoes and cauliflower florets for around 25 minutes until soft and fork-tender. 

  2. Then, preheat the oven to 430° F (220° C) and line two baking sheets with parchment paper.

  3. Once the potatoes and cauliflower are done cooking, drain them well. Using an immersion blender, fork or food processor, mash them until completely smooth.

  4. Add potato starch, salt, pepper and mix until well-combined.

  5. Using a wet spatula, thinly spread the potato mixture onto your prepared baking sheets, forming two pizza crusts.

  6. Place the baking sheets into the oven and bake your potato crust for 15-20 minutes until lightly golden.

Assemble the Veggie Pizza

  1. Once this time has elapsed, remove the potato pizza crust from the oven. Spread with hummus and top with chickpeas, zucchini, tomato, mushrooms and onion.

  2. Lightly season your potato veggie pizza with salt and pepper and return to the oven to bake for another 15 minutes.

  3. Top with fresh arugula, nutritional yeast or vegan parmesan if desired, then serve immediately. Enjoy

Recipe: Quinoa Veggie Bowl

Quinoa Veggie Bowl

An easy, plant based meal that celebrates the bounty of spring. This Quinoa Veggie Bowl will leave you feeling healthy and satisfied. A big dollop of pesto brings tons of bright, fresh flavor.

Link to the Original Recipe from www.veggieinspired.com

Ingredients

  • 1 ½ cups dry quinoa

  • 2 ½ cups water or vegetable broth

  • 1 bunch asparagus woody bottom stems snapped off or trimmed

  • 1 bunch radishes halved or quartered (stems and leaves removed)

  • 2 teaspoons olive oil divided (see notes for an oil-free option)

  • salt and pepper to taste

  • 2 handfuls fresh spinach leaves

  • ½ cup chopped or slivered raw almonds

  • 1 recipe Pumpkin Seed Pesto

Instructions

  • Preheat the oven to 400°F.

  • You can use your favorite store bought pesto OR make the pesto from scratch. You can make the pesto ahead of time if you wish and keep in the fridge. (click here for Pumpkin Seed Pesto recipe)

  • Toss the radishes with 1 teaspoon of olive oil and a sprinkle of salt and pepper. Spread on a rimmed baking sheet in one even layer.

  • Spread the asparagus spears out in one even layer on another baking sheet. Drizzle with 1 teaspoon olive oil and sprinkle with salt and pepper.

  • Roast both pans for 20 to 25 minutes until the vegetables are browned and tender. Stir the veggies on the pan and spread back out after 15 minutes.

  • While the vegetables are roasting, place quinoa and water (or vegetable broth for added flavor) in a medium pot and bring to a boil. Turn down heat to a simmer, cover, and cook for about 15 minutes until the water is absorbed and the quinoa is cooked through. Fluff with a fork.

  • To assemble the bowls, place a small handful of spinach in a bowl, top with quinoa, roasted veggies, almonds, and a dollop of pesto.

Notes

~ The pesto can be made ahead of time and kept in an air-tight container in the fridge for up to 5 days.

~ Rinse the quinoa well before cooking to remove any debris or bitterness.

~ Fluff the quinoa with a fork when it’s done. Do not stir it with a spoon…that will just make it sticky and mushy.

~ Use rice, couscous, orzo or any grain you love instead of quinoa to mix it up.

~ A drizzle of oil on the vegetables will help them brown and caramelize and produce a richer flavor. It will also prevent them from sticking to the pan.

~ For an oil-free option, use a squeeze of lemon juice or dash of tamari instead. Place a sheet of parchment paper on the baking sheet under the veggies to prevent sticking.

~ Add some white beans or baked tofu for an added protein boost.

Recipe: Vegetarian Chocolate-Dipped Strawberries

Chocolate-Dipped Strawberries

Indulge in chocolate-dipped strawberries as part of a romantic desert this Valentine’s Day. Drizzle over milk and white chocolate for the wow factor! Check out the recipe below or click the link for the original!

Link to the Original Recipe from www.bbcgoodfood.com

Ingredients

  • 100g dark chocolate, roughly chopped

  • 400g strawberries

  • 30g white and milk chocolate, roughy chopped (optional)

Instructions

  • STEP 1

    Cut a strip of baking parchment and leave to one side. To melt the dark chocolate, fill a small pan with 2cm water and bring to a simmer. Put the chocolate in a heatproof bowl and rest it on top of the pan, ensuring the bowl isn’t touching the water. Stir the chocolate to gradually melt it. Or, melt the chocolate in 20 second blasts in the microwave, stirring after each blast until melted. Put the melted chocolate in a small deep bowl.

  • STEP 2

    Gently hold the strawberries by the leafy top and dip into the chocolate. Tap off any excess chocolate and put on the parchment to set. If you have any leftover chocolate, pour it onto another strip of parchment and leave it to set, it can be used again.

  • STEP 3

    If you'd like to decorate the strawberries, melt the white and milk chocolate and drizzle lightly over the fruit.

Recipe: The Joy of Za’atar

The Joy of Za’atar

by Melinda V. McLain

As our gardens give up the last bits of summer harvest, it’s now time for Fall feasting on hard squashes, gourds, and of course, some of ya’ll are having a great time with your annual love affair with all things pumpkin.

Before the pandemic, The Good Table UCC spiritual community always had a community meal after our Sunday Gathering that we called La Mesa. Like so many other things lost during the pandemic, we have not restarted this weekly shared meal due to COVID concerns. But here’s a favorite dish that Bonnie Hariton used to bring to share at La Mesa from Jerusalem: A Cookbook by Yotam Ottolenghi and Sami Tamimi, that you can make it home. And hopefully, we’ll be able to restart La Mesa again in our new space in El Sobrante sometime next year!

The star ingredient of this dish is a Middle-Eastern spice blend called za’atar. You can make this spice yourself, or you can buy it at Middle-Eastern or other well-stocked grocers. The name, za’atar is of ancient origin, possibly Akkadian, but also describes the plant known in English as hyssop. While this spice blend varies from culture to culture in the Middle East, it is usually a blending of herbs such as oregano, thyme, coriander, marjoram, or hyssop with sumac, sesame, and salt. And even if this recipe doesn’t appeal to you, za’atar is a fabulous addition to almost any dish that needs a bit more pizzazz!

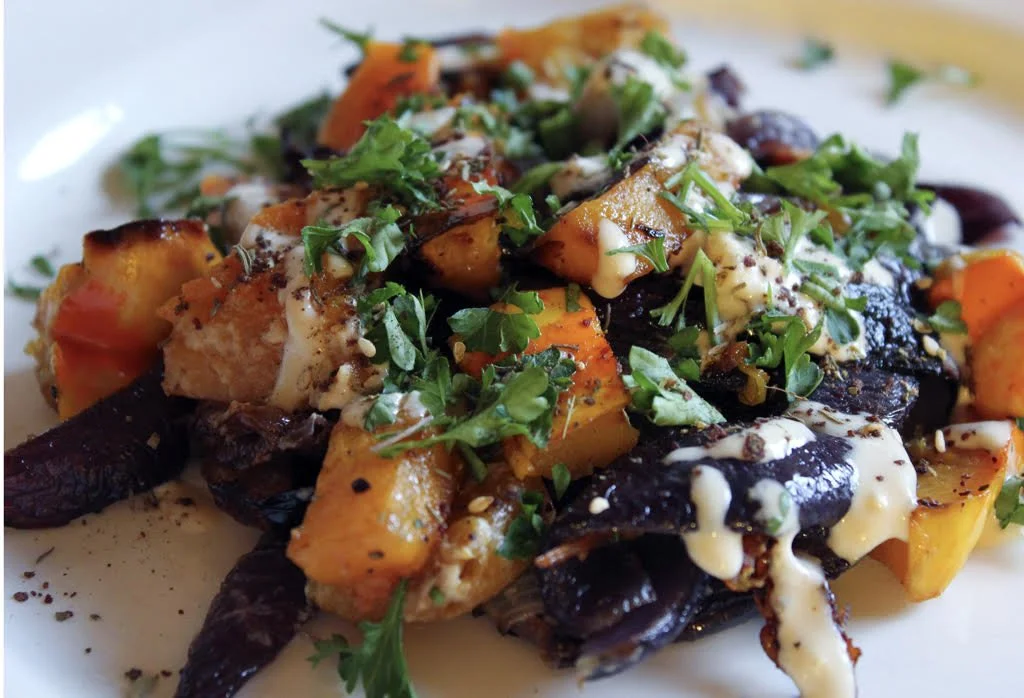
Roast Butternut Squash with Red Onion, Tahini, and Za’atar

Great as a vegetarian/vegan entree or an excellent side dish! Consider adding to your Thanksgiving or holiday table too.

Ingredients:

1 large butternut squash, cut into wedges (some like it peeled)

2 red onions, cut into 1” wedges

4 tbsp good olive oil

Maldon (or another good) sea salt and black pepper

3 1/2 tbsp tahini paste (easily found now at Trader Joe’s!)

3 1/2 tbsp lemon juice

3 tbsp water

1 small garlic clove, crushed

1 oz pine nuts (about two tbsp)

1 tbsp za’atar

1 tbsp roughly chopped parsley

Directions:

Preheat oven to 425 degrees. Put the squash and onions in a large bowl, add three tablespoons of olive oil, a teaspoon of salt and some black peeper, and toss well. Spread on a baking sheet and roast for 40 minutes until the vegetables have taken on some color and are cooked through. Keep an eye on the onions – they may cook faster than the squash, so they might need to be removed earlier. Remove from oven and let cool.

Put the tahini in a small bowl with the lemon juice, water, garlic and a 1/4 tsp of salt. Whisk to the consistency of honey, adding more water or tahini as necessary.

Pour the remaining oil into a small sauté pan on medium low heat. Add the pine nuts and half a teaspoon of salt, cook for two minutes, stirring until the nuts are golden brown, then tip the nuts and oil into a small bowl.

To serve: spread the vegetables on a platter and drizzle over the sauce. Scatter the pine nuts and oil on top followed by the za’atar and parsley. Option: Bonnie throws in some pomegranate seeds for color and little flavor bombs!

Happy Fall!

Recipe: Harvest Fatoosh Style Salad

We’re sharing this week’s recipe from a fabulous local organization run by an Episcopal priest friend of Rev. Melinda. You can check out their website by CLICKING HERE!

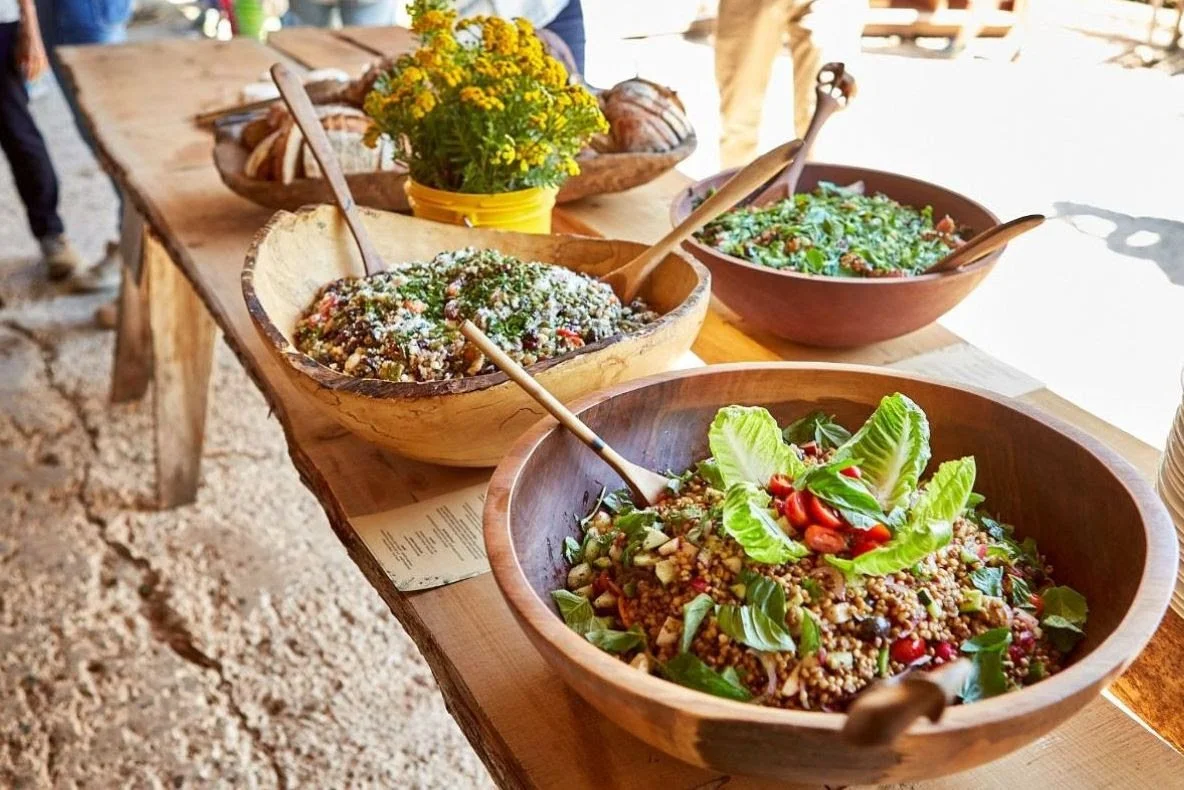
Harvest Fatoosh Style Salad

At our 8th Annual Harvest, in August, we were treated to a delicious salad made with blistered whole grain Hourani berries. The salad was created by Chef Dominic Machi, Director of Food and Nutrition Services at one of California’s largest school districts, Mt. Diablo Unified School District, along with his Culinary Manager, Chef Joshua Gjersand.

Since then we’ve had many requests to share the recipe (Harvest Fatoosh Salad) and offer whole Hourani berries to our customers. So, here we go!

Harvest Fatoosh Style Salad

Serves six

Ingredients:

1 cup Hourani whole wheat berries, soaked and cooked
1/4 cup freshly squeezed lemon juice (2 lemons)
1/4 cup good olive oil
2 teaspoons flake salt
½ cup sheep’s feta, crumbled or diced
2 minced scallions, white and green parts
1 bunch or about 1/2 cup chopped fresh mint leaves
1 bunch or about 1/2 cup chopped flat-leaf parsley
1/2 firm cucumber, unpeeled and chopped
2 cups seasonal tomatoes, chopped
Freshly ground black pepper

Directions:

Soak the Hourani berries in water for 6-12 hours. Drain and rinse the berries. Place berries in a saucepan with a 1⁄4 tsp salt and enough water to generously cover them. Bring to a boil and turn down to simmer for about 20 minutes until al dente. The grain should be plump and chewy, not hard or mushy. Drain well and place in a large bowl. Drizzle the olive oil, 1 tsp. salt and pepper while still warm. Let cool.

While the berries are cooling, chop the scallions, mint, parsley, cucumber, tomatoes, feta, 1 teaspoon flake salt, and more pepper. Gently mix the herbs, vegetables, and feta into the berries. Squeeze lemon juice and more olive oil if you wish and mix. Season, to taste. Serve at room temperature or cover and refrigerate. Tabbouleh is best enjoyed at room temperature. If refrigerated, let sit for 30 minutes before serving.

Optional - boost nutrition and digestibility

Sprouting the berries

As with all wheat berries, sprouting them before cooking unlocks loads of health benefits.* The germination process breaks down some of the starch, which makes the percentage of nutrients higher.

It also breaks down phytate, a form of phytic acid that normally decreases absorption of vitamins and minerals in the body. So sprouted wheat has more available nutrients than unsprouted grains. Those nutrients include folate, iron, vitamin C, zinc, magnesium, and protein. Sprouted grains also may have less starch and be easier to digest than regular grains. It may help people who are sensitive to digesting grains.

Method
It’s easy. Use a 64 oz. glass Mason jar. Place the berries in the jar and fill the jar with water. The water line should cover the berries by 2-3 inches.

Let sit at room temperature for 12 hours. Drain the water and rinse with clean water, drain again.

Turn the jar on its side. Spread the berries out for maximum air circulation.

It can take anywhere from 6-12 hours to sprout. Depending upon the time of year–warmer temperatures will reduce the amount of time it takes to sprout the berries. Every 6 hours, turn the jar upright, fill with water to wet the grains and drain. Set the jar on its side and spread grains out again to continue the sprouting process.

The berries are considered sprouted when the tip of the root (the radicle) emerges from the berries. When you see tiny white tails emerge, the grain is ready to cook.

Once sprouted, cook immediately per the directions above, or refrigerate for up to 24 hours. Sprouted, uncooked berries can be frozen for up to two months.

*Harvard Health Blog

Recipe: Mediterranean Summer Salad

Mediterranean Summer Salad

By Melinda V. McLain

I recently made this salad for a tailgate at the Santa Fe Opera, but it is both perfect for any picnic potluck or substantial enough to serve as a main dish. It is also easy to substitute ingredients for dietary preferences or make it using the bounty of your garden! It keeps well and is easy to serve outside. Quantities below are general, but I try to make sure the ingredients are somewhat evenly distributed, so you get a bit of everything in each bite. Enjoy!

Mediterranean Summer Salad

Serves six

Ingredients:

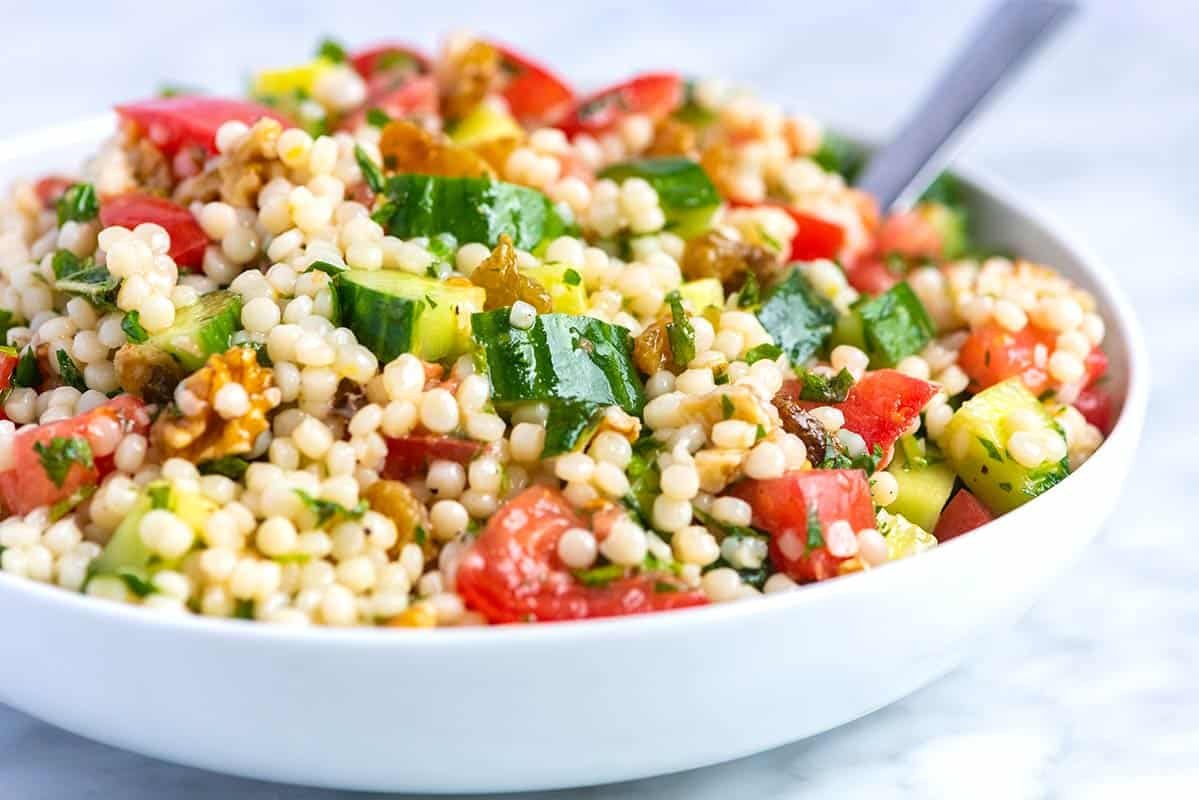
1 cup Israeli pearl couscous (or farro) or gluten-free couscous

1 large cucumber chopped bite-sized

2 Large heirloom tomatoes chopped or a cup of cherry tomatoes halved

1 small red onion finely chopped

3 oz of Feta cheese (cheaper to chop the brick than buy crumbles)

3 oz Kalamata olives (half a jar from Trader Joe’s) or to taste

2 tbsp Chopped fresh parsley

2 tbsp Olive oil

Fresh lemon juice from two large lemons (we use Meyer lemons from garden)

Salt & Pepper to taste

Optional: Add roasted or broiled chicken cut into bite-sized chunks or chickpeas for veggie and vegan-friendly extra protein. 

Instructions:

  1. Cook the couscous. I learned how to do this from Bob’s Red Mill. Drain it, run cold water over it, and cool it in the fridge in a large bowl that you can also use to serve outside.

  2. Squeeze the juice of two large lemons into the couscous and add a couple of tablespoons of good olive oil. Mix well.

  3. Chop cucumber, tomatoes, feta, olives, onion and parsley. (or whatever veggies you have on hand or in your garden) and toss into the bowl of couscous.

  4. Toss well and make sure ingredients are evenly distributed. Taste it enthusiastically to make sure it’s good! ;-)

  5. Store in fridge until needed so that flavors combine well. It’s often better the next day.